> For the complete documentation index, see [llms.txt](https://docs.ilert.com/llms.txt). Markdown versions of documentation pages are available by appending `.md` to page URLs; this page is available as [Markdown](https://docs.ilert.com/integrations/inbound-integrations/odoo.md).
# Odoo Inbound Integration
Create alerts in ilert from Odoo Helpdesk tickets — with ilert's Odoo inbound integration
[Odoo](https://www.odoo.com/) is an open-source suite of business apps covering CRM, sales, projects, inventory, accounting and — with the Helpdesk app — customer support ticketing. Odoo's automation rules can react to record changes and call out to external systems via webhooks. With this integration, tickets raised in Odoo Helpdesk automatically create alerts in ilert, so the right responders are notified and escalations happen reliably.
## In ilert: Create an Odoo alert source
1. Go to **Alerting** → **Alert sources** and click **Create new alert source**.
2. Search for **Odoo**, click its tile, and click **Next**.
3. Give your alert source a name, optionally assign teams, and click **Next**.
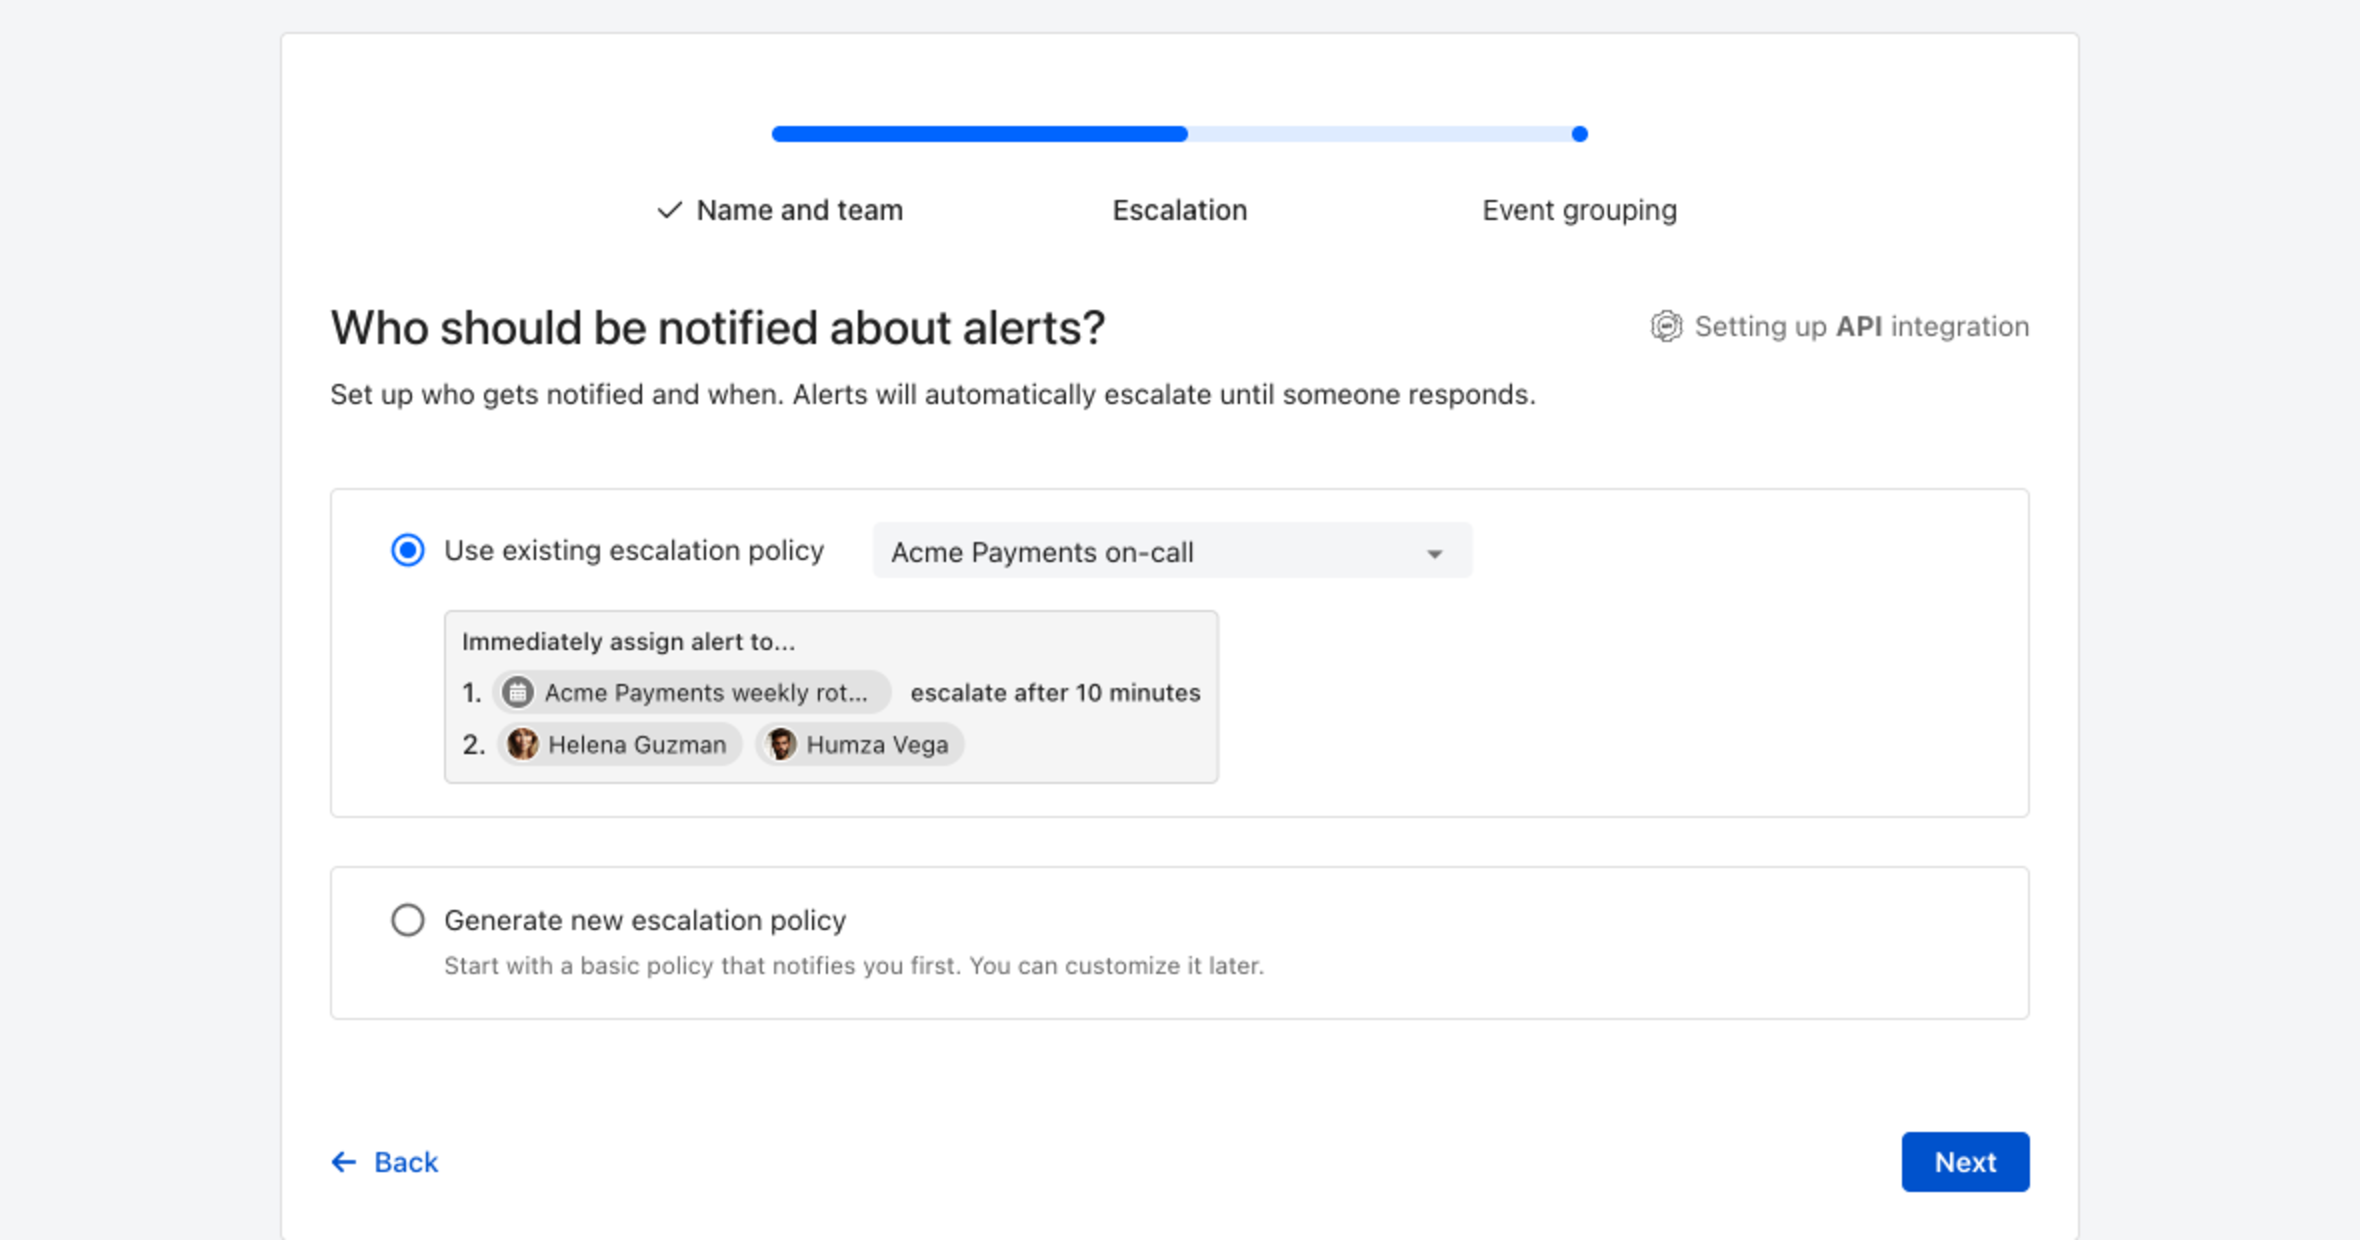
4. Choose who gets notified: select **Use existing escalation policy** and pick a policy, or **Generate new escalation policy** to start with a basic one that notifies you first. Click **Next**.
Pick an existing escalation policy, or generate a basic one without leaving the wizard.
5. Select **Default grouping** and click **Continue setup**. It groups events by the alert key the integration sets; the other [grouping options](/alerting/configure-alerting/alert-sources.md#event-grouping) are easier to judge once events are arriving.
6. The next page shows more settings, such as notification priority and alert templates. Click **Finish setup** for now; you can change them later.
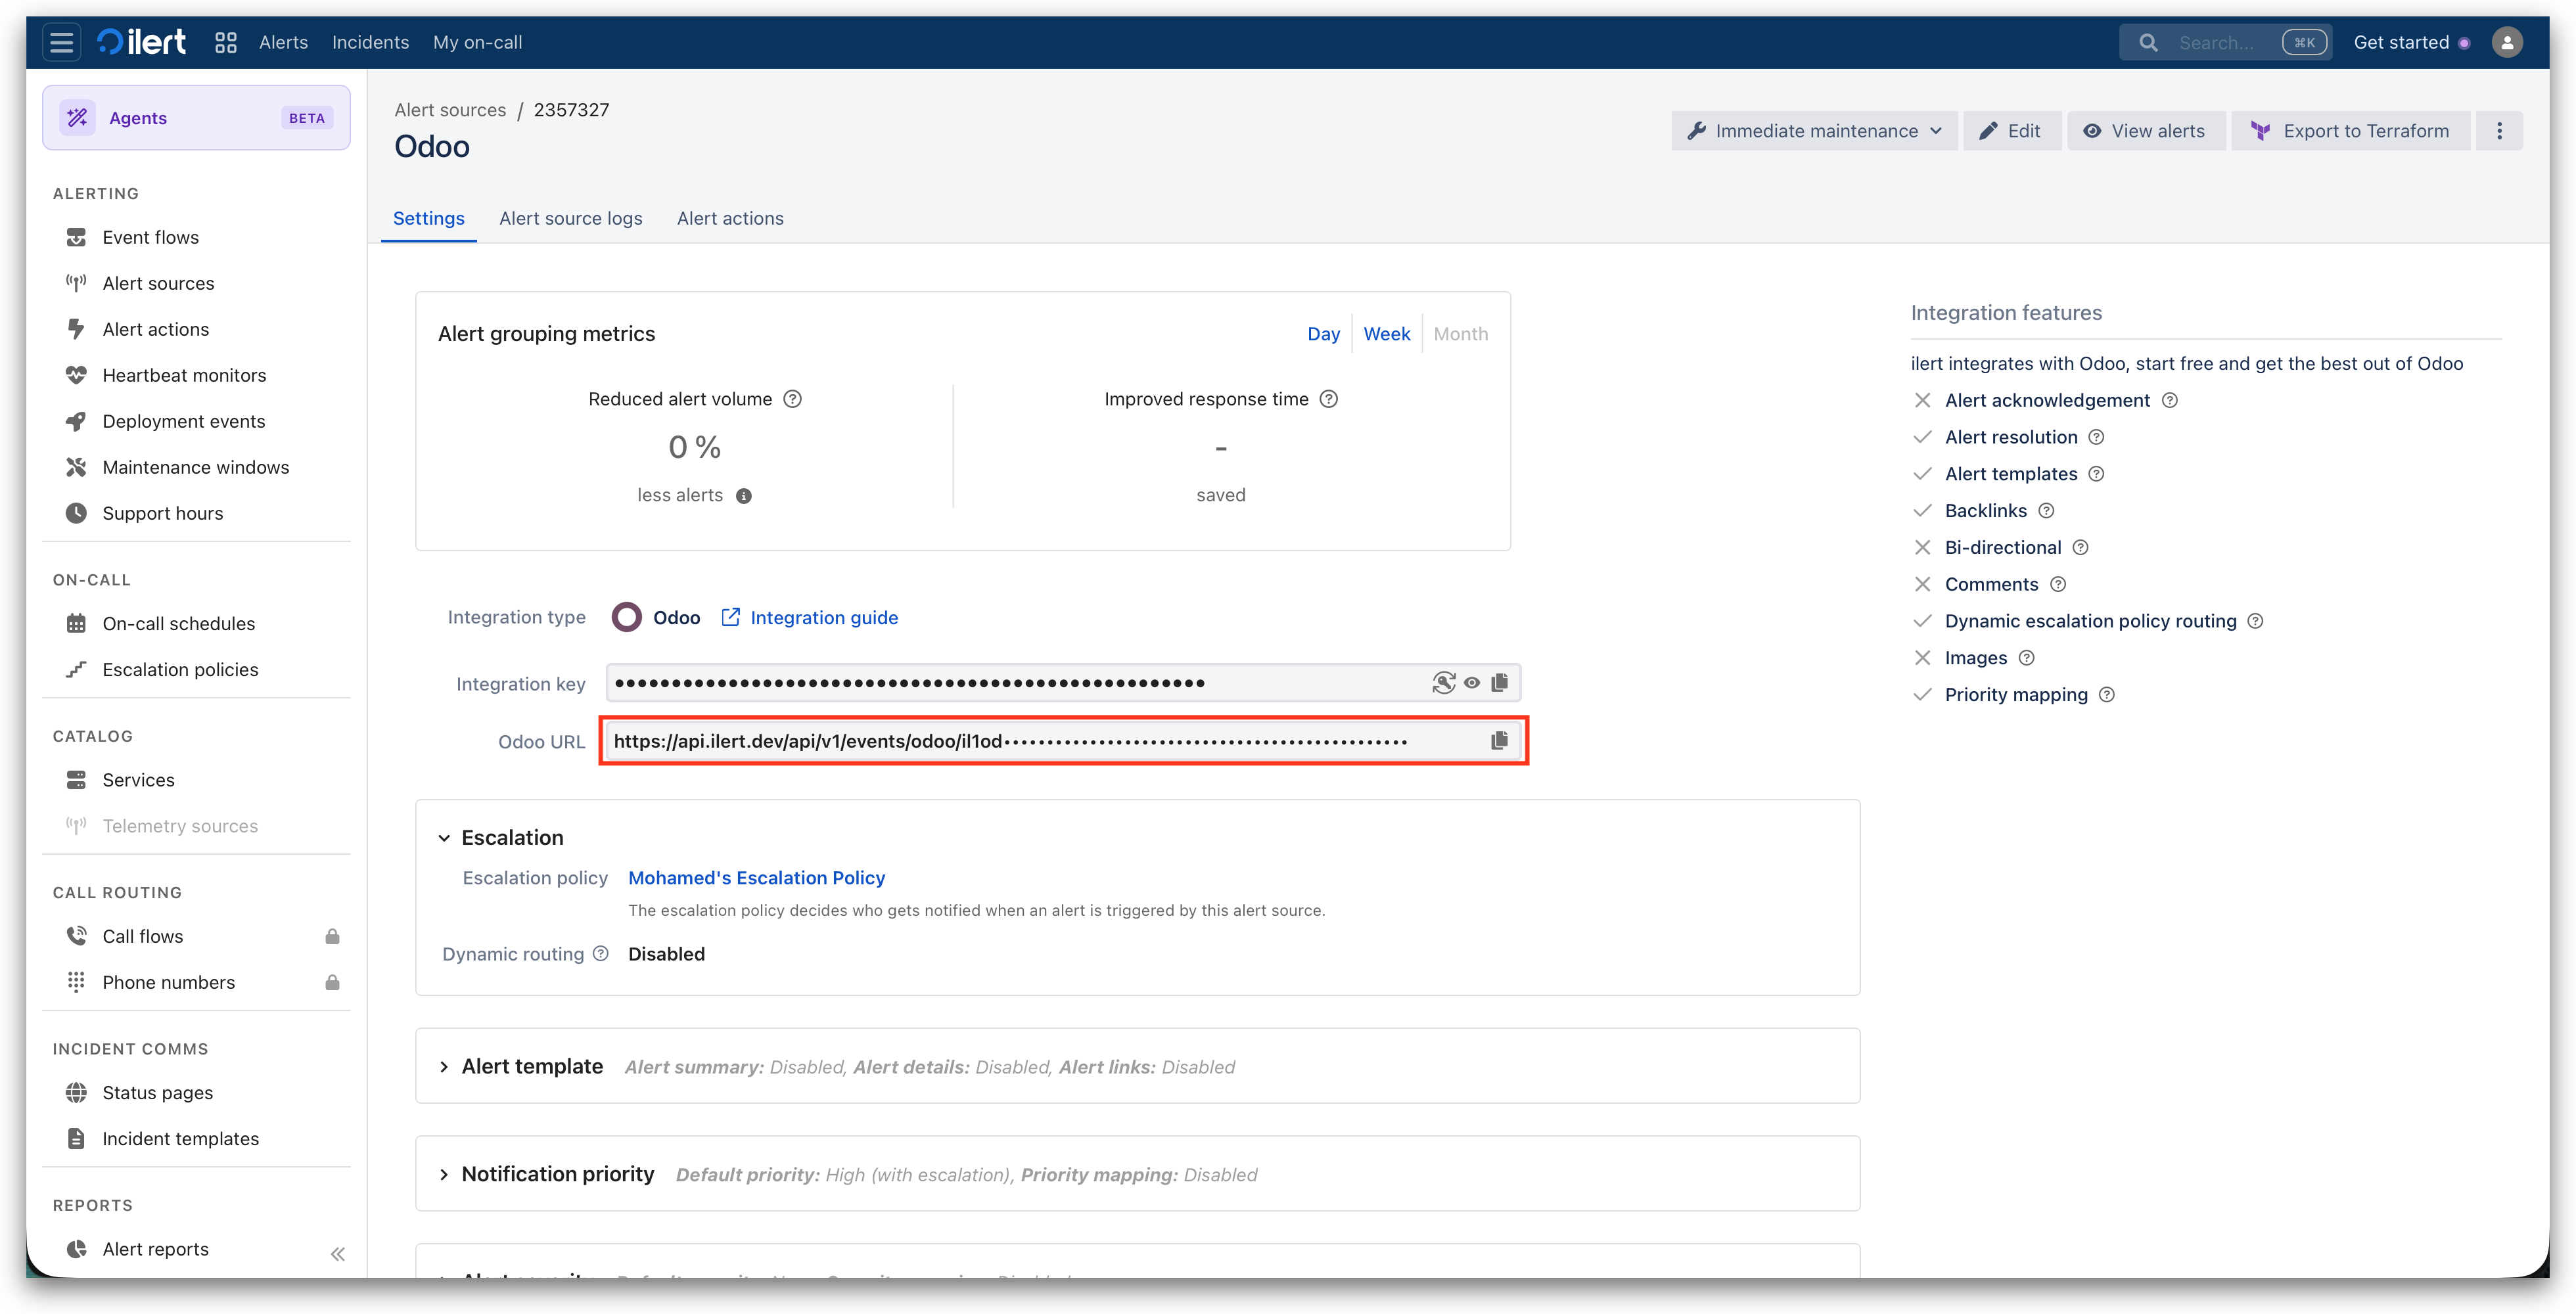
7. On the final page, ilert generates an **Odoo URL** for your alert source. Copy it — you will need it in the next section.
## In Odoo: Install Studio
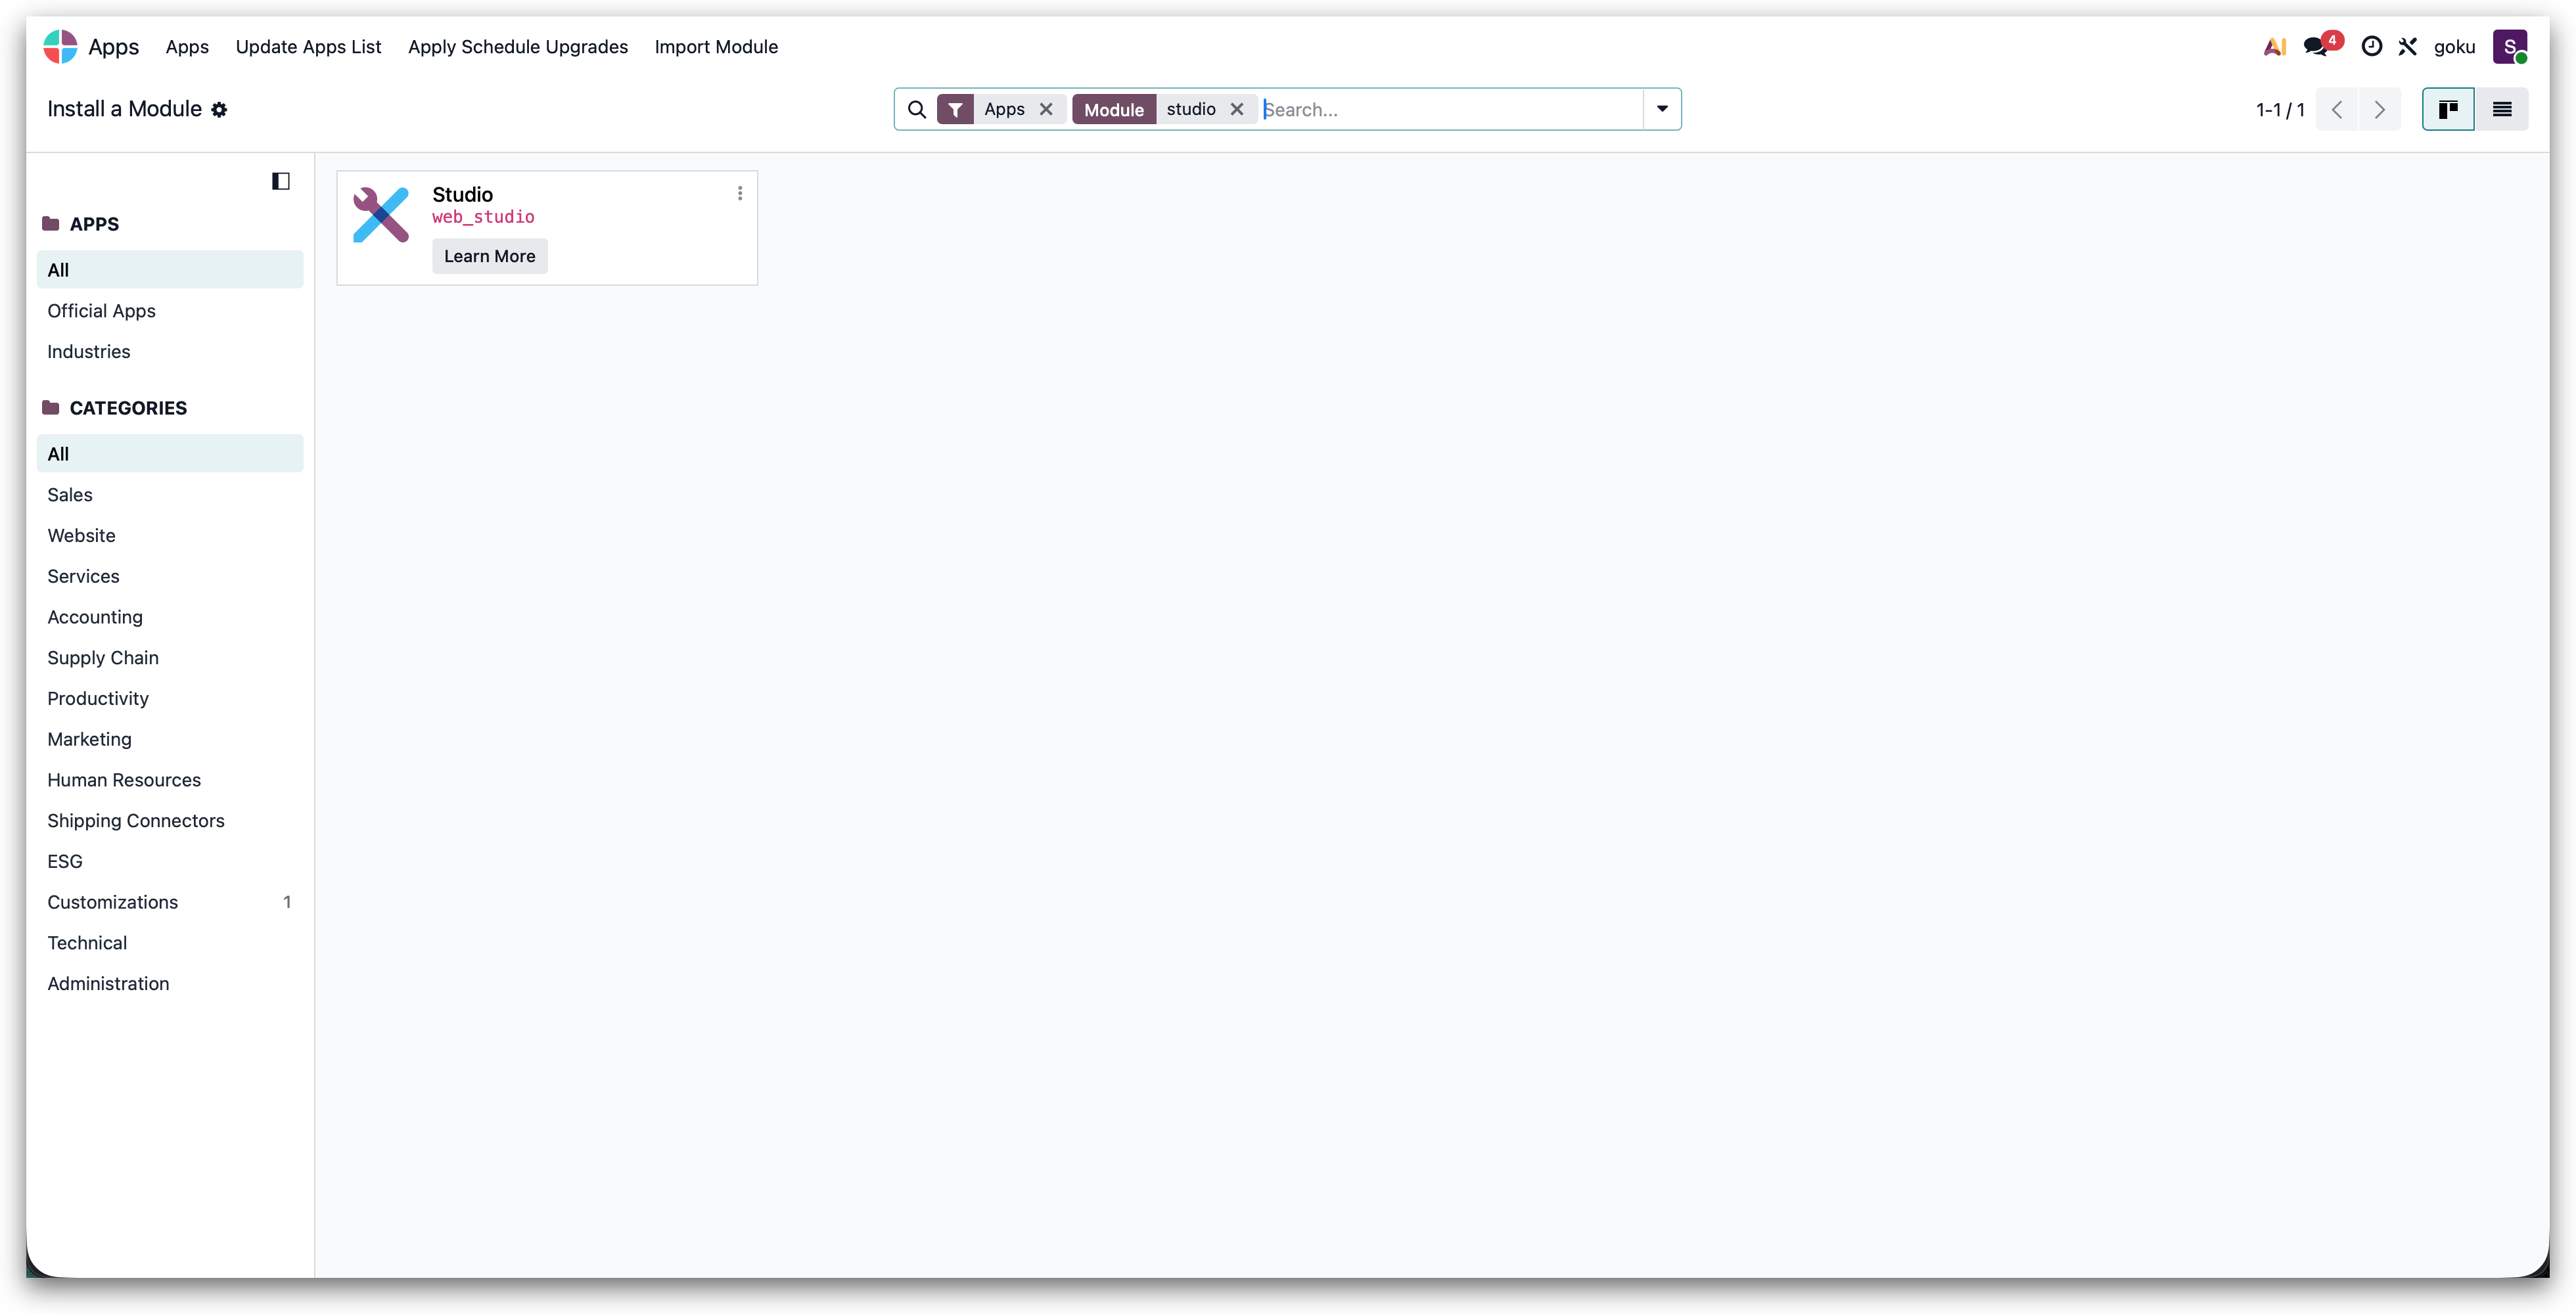
Webhook actions and custom fields are configured with Odoo **Studio**. If it is not installed yet, go to **Apps**, search for `studio` and install the **Studio** (`web_studio`) module.
## In Odoo: Send tickets to ilert
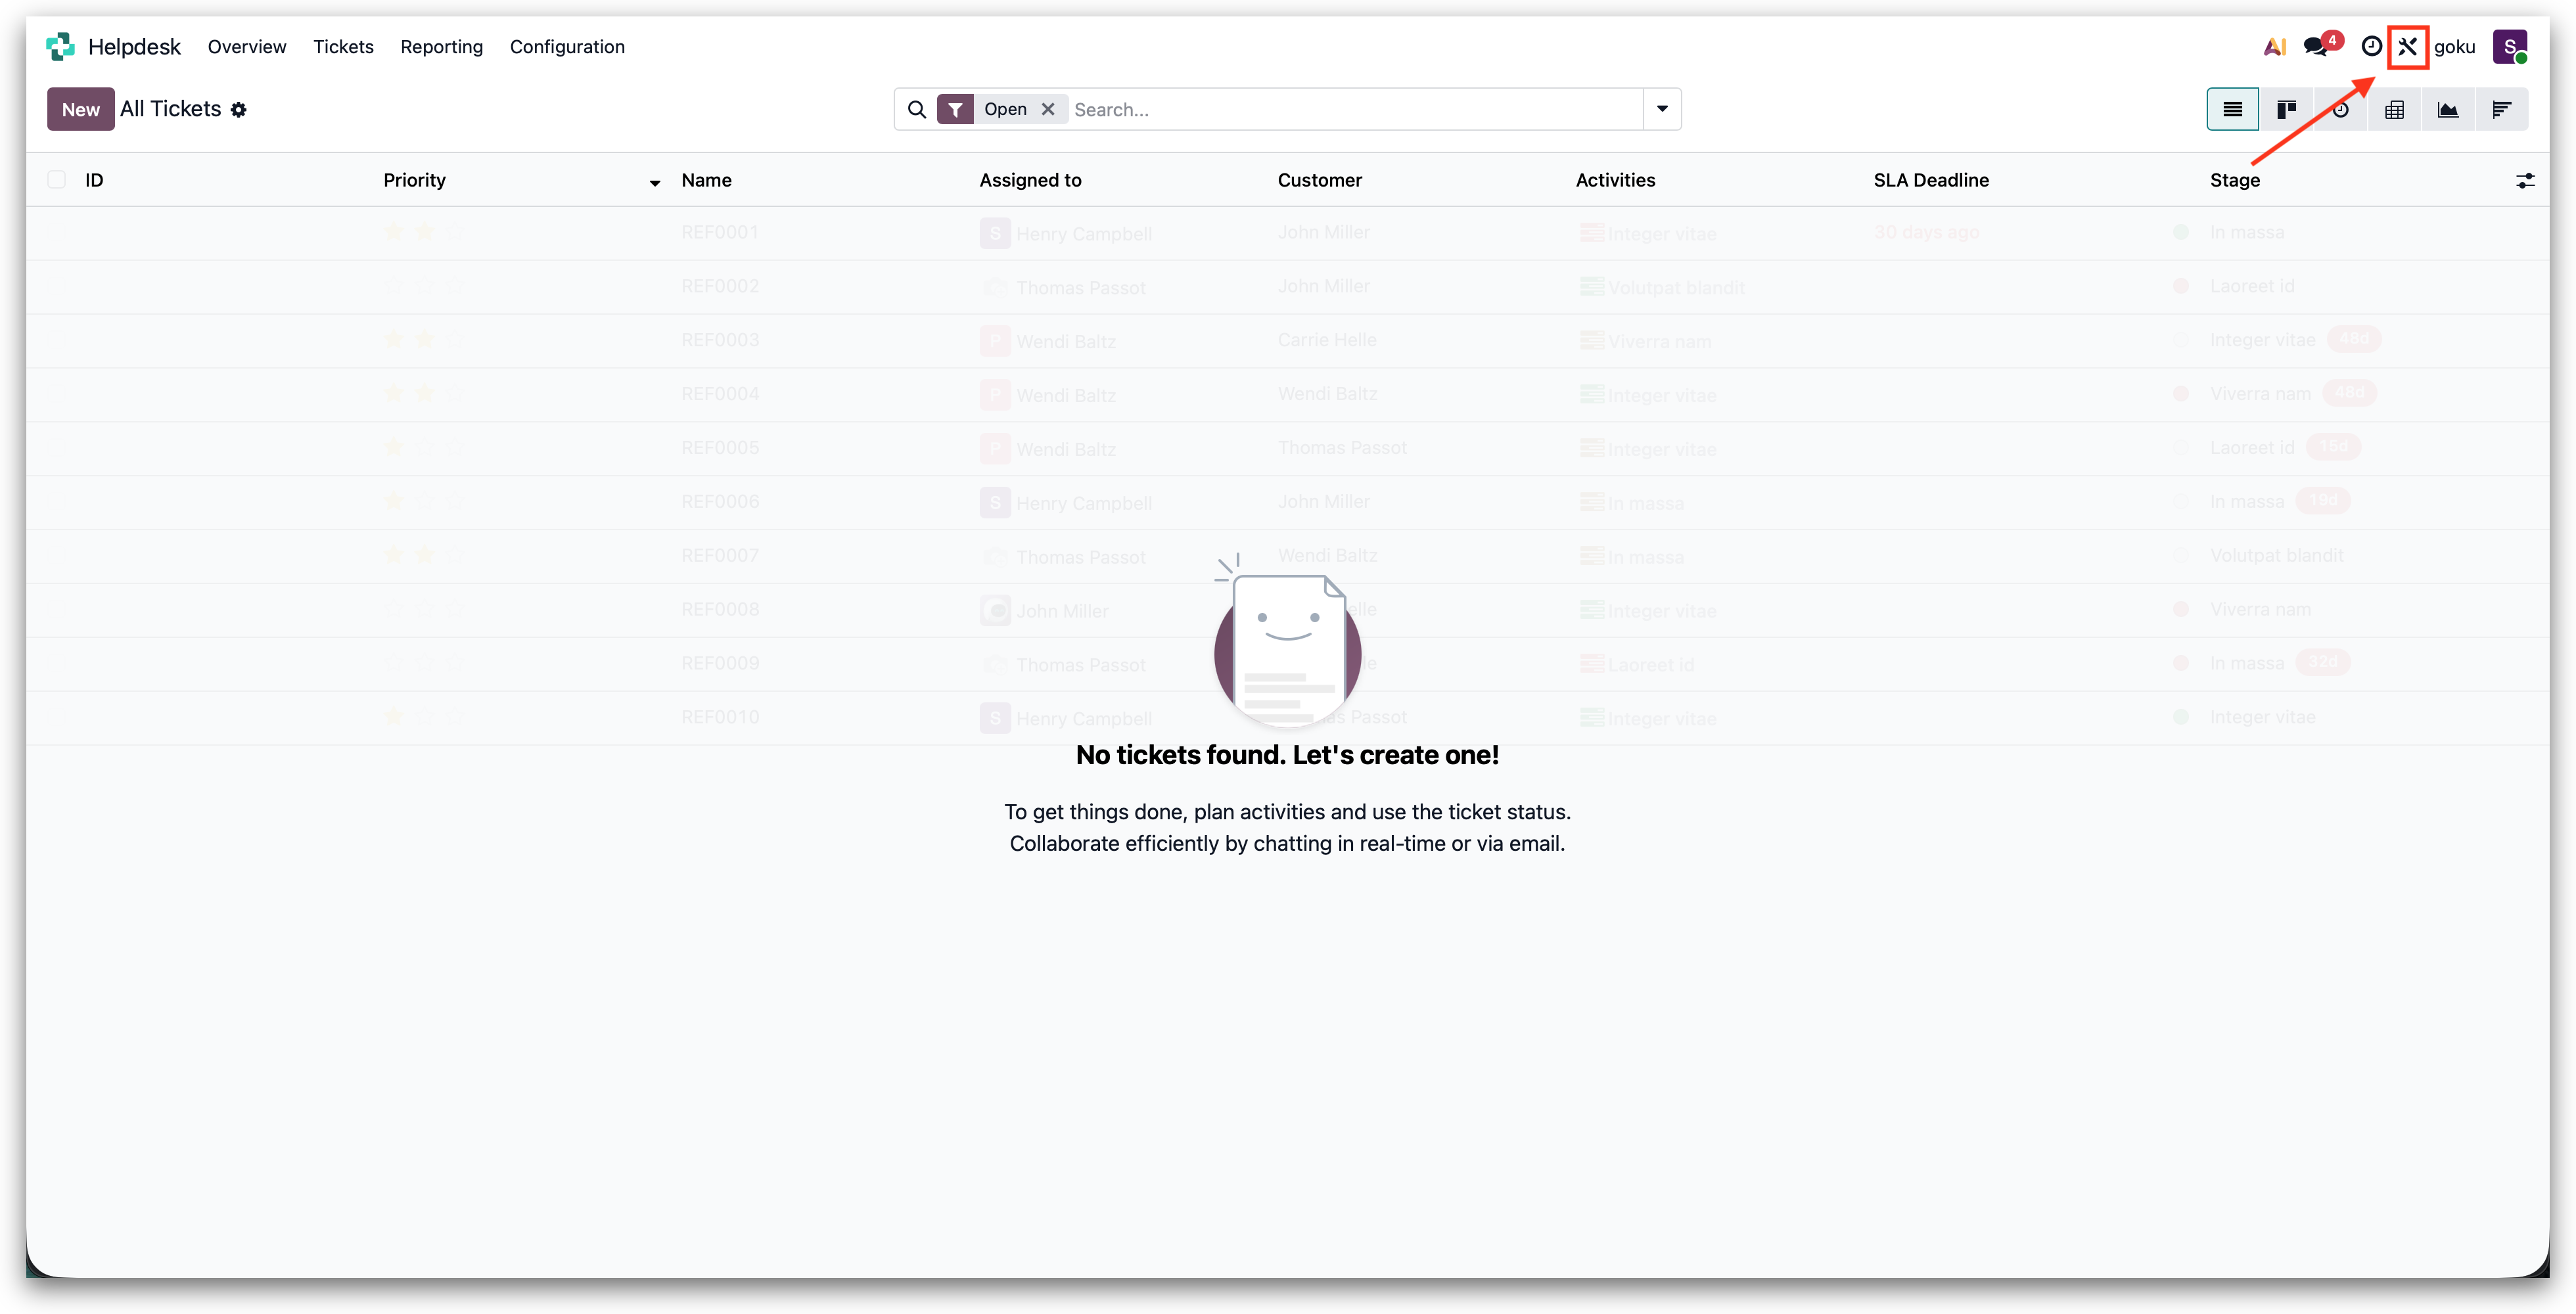
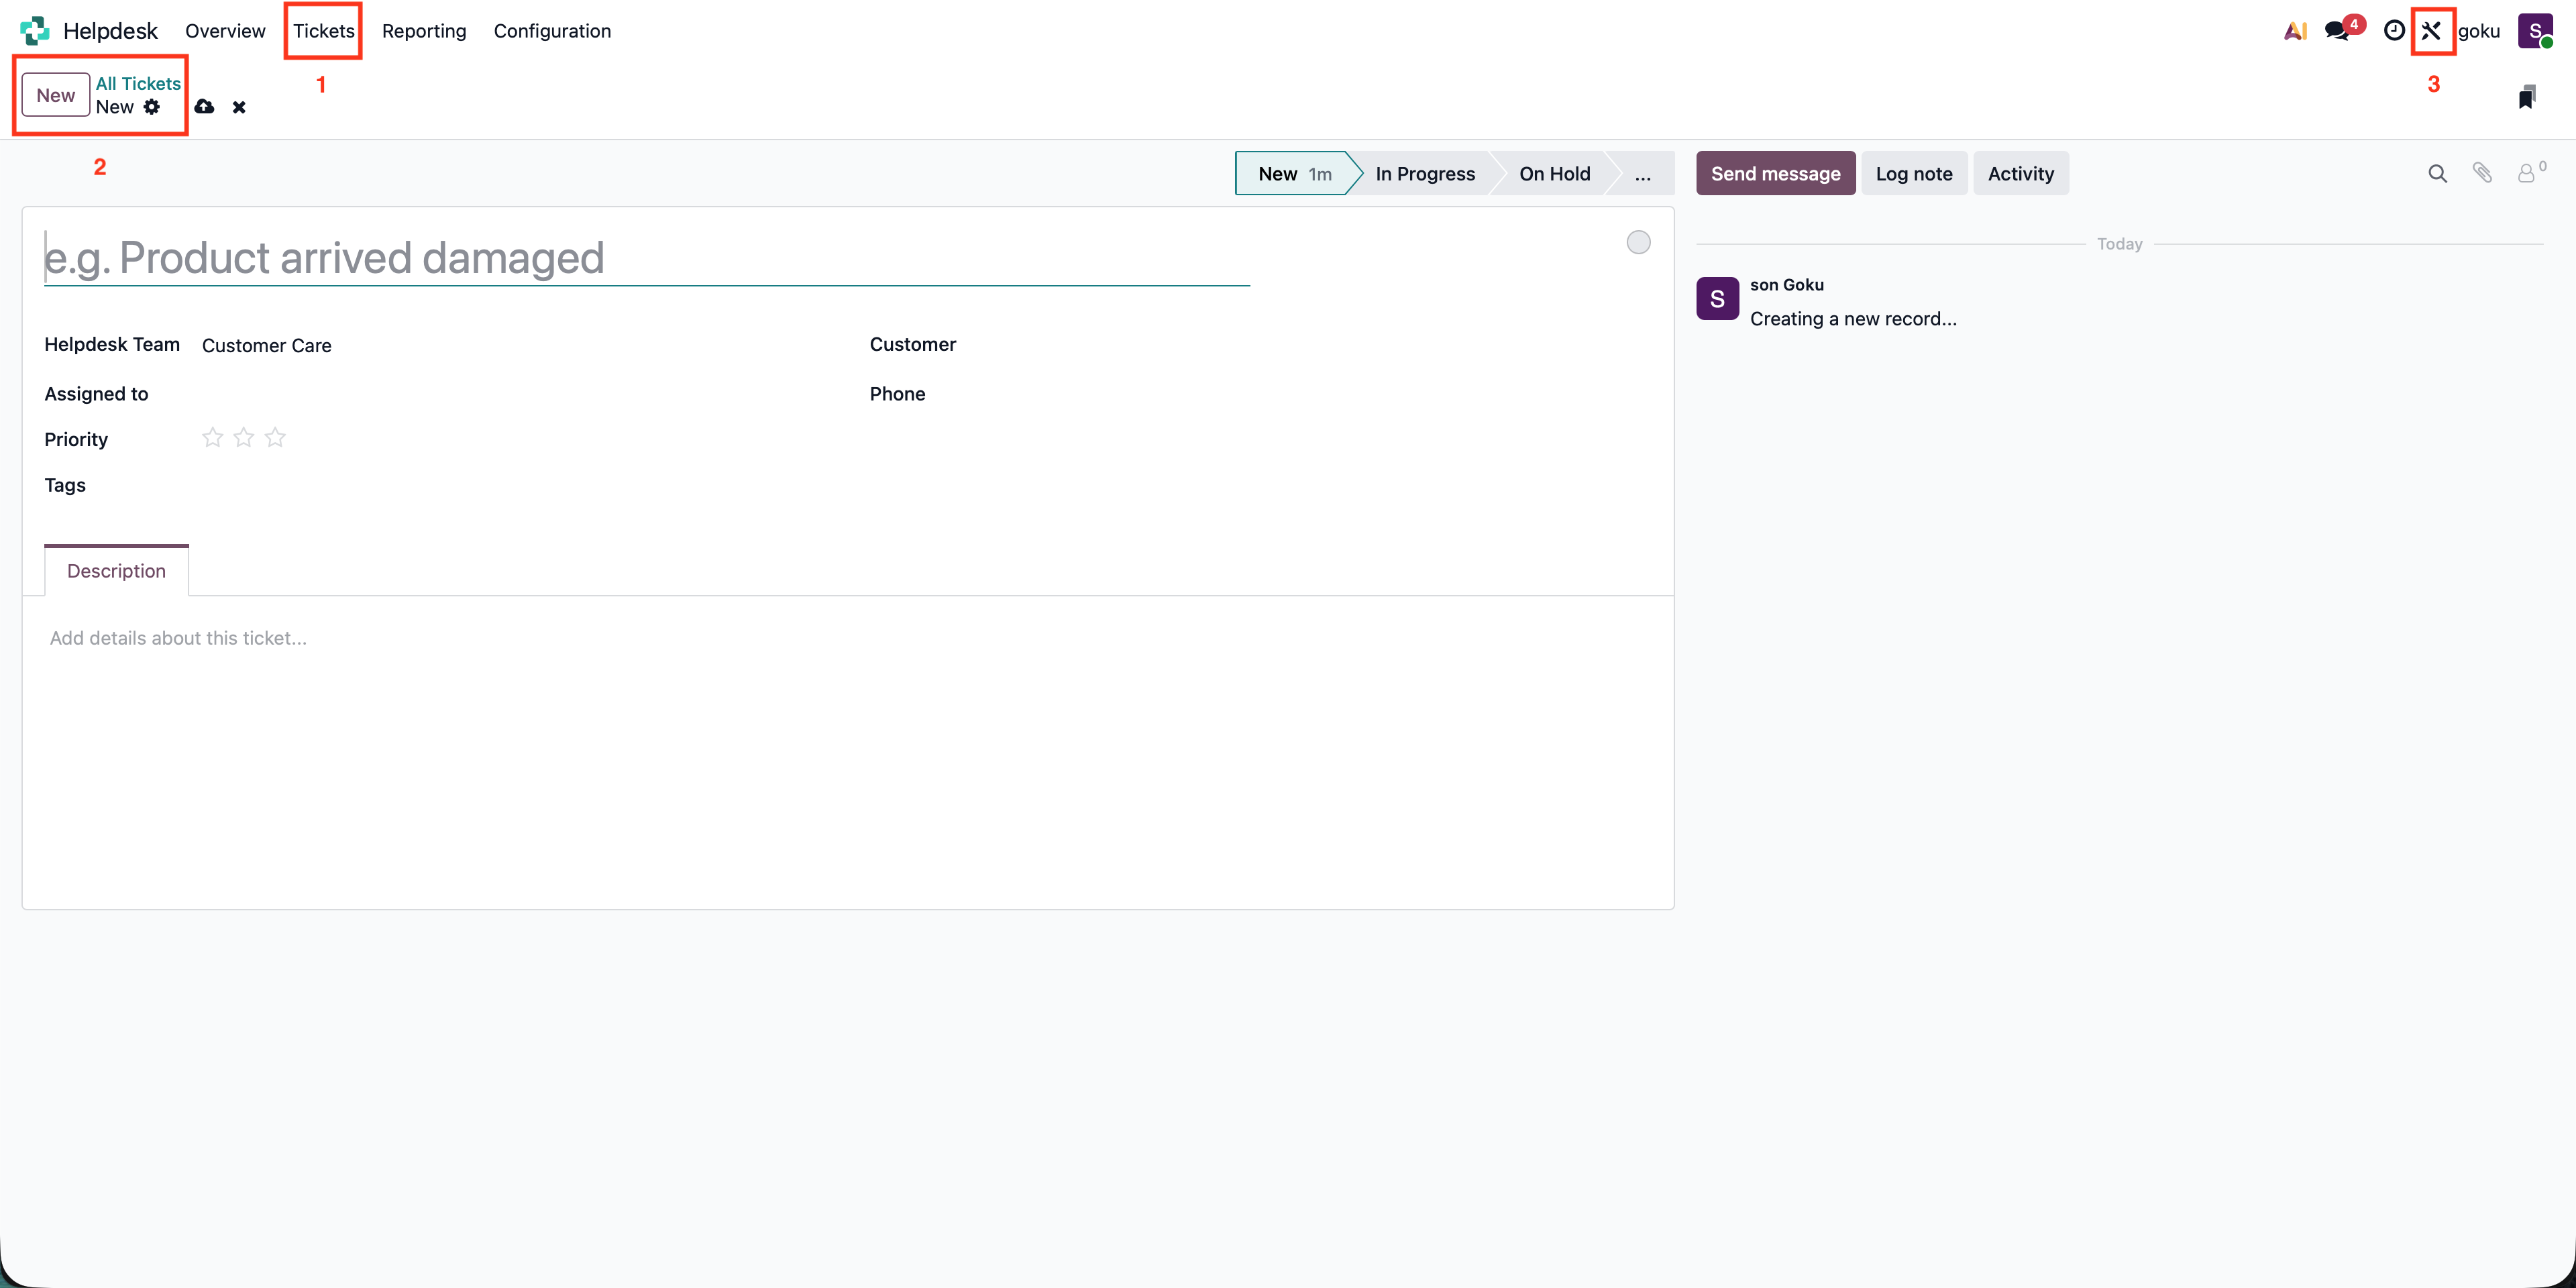
1. Open the **Helpdesk** app and click the wrench icon (🛠) in the top right to enter Studio.
2. Go to **Automations** and click **New**.
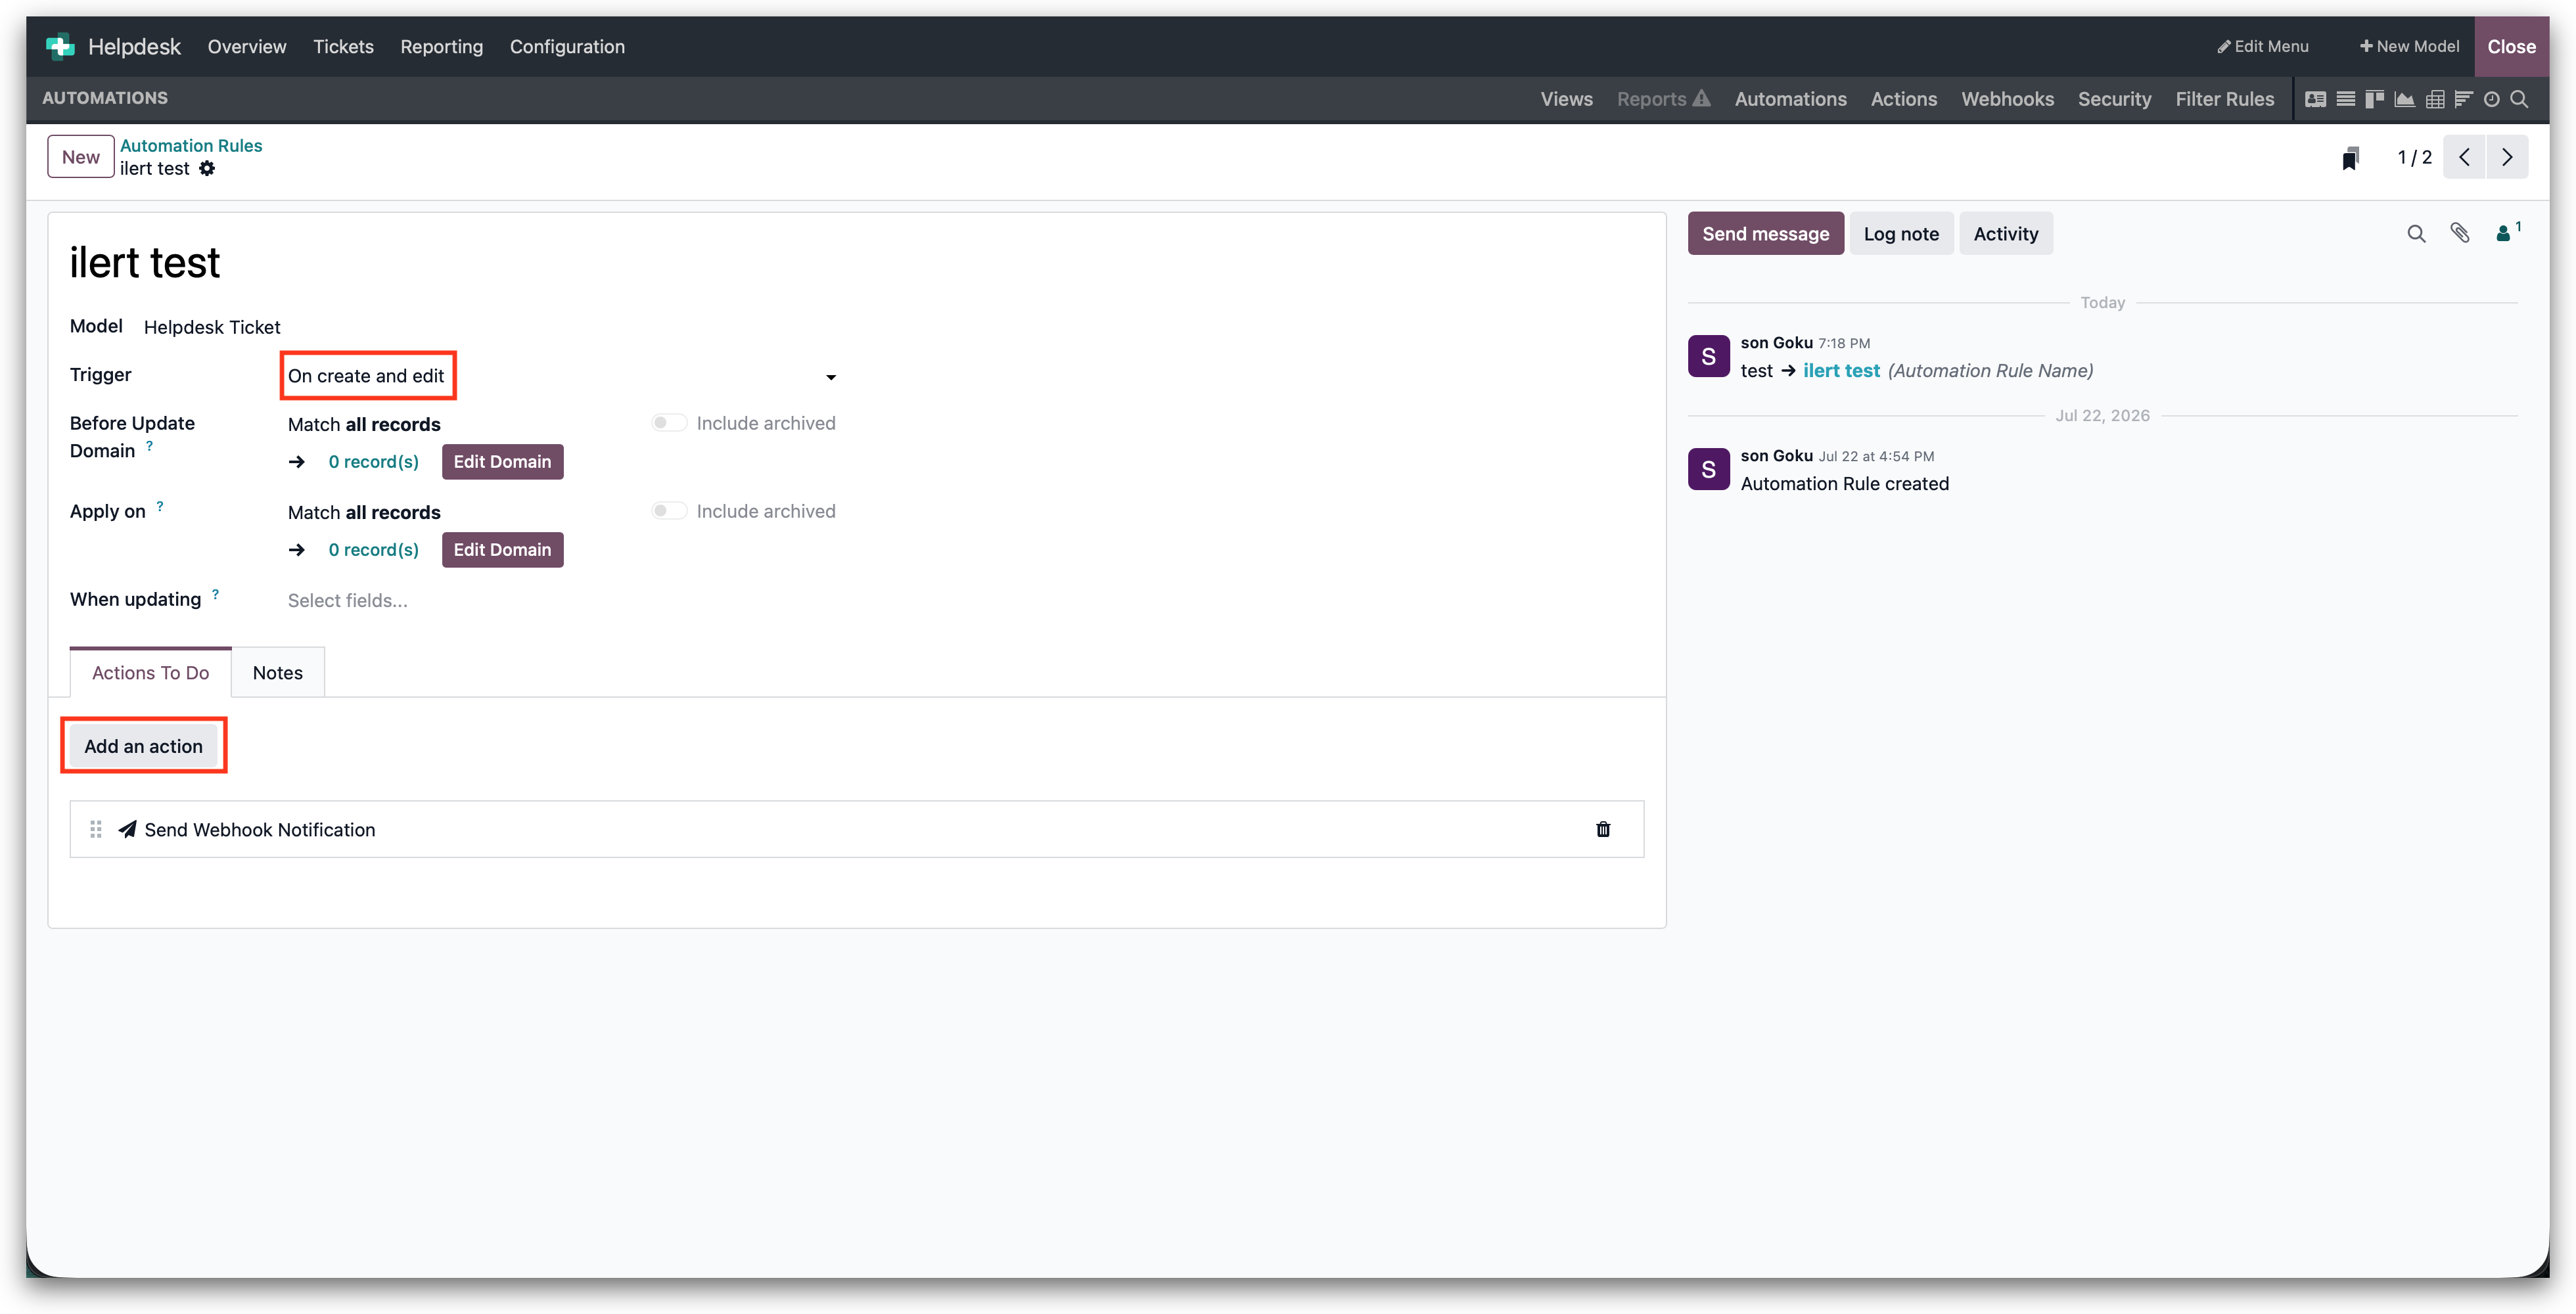
3. Give the rule a name, keep **Model** set to **Helpdesk Ticket**, choose a **Trigger** — for example **On create and edit** — and adjust the remaining settings, such as the domains under **Apply on**, if you only want certain tickets to reach ilert.
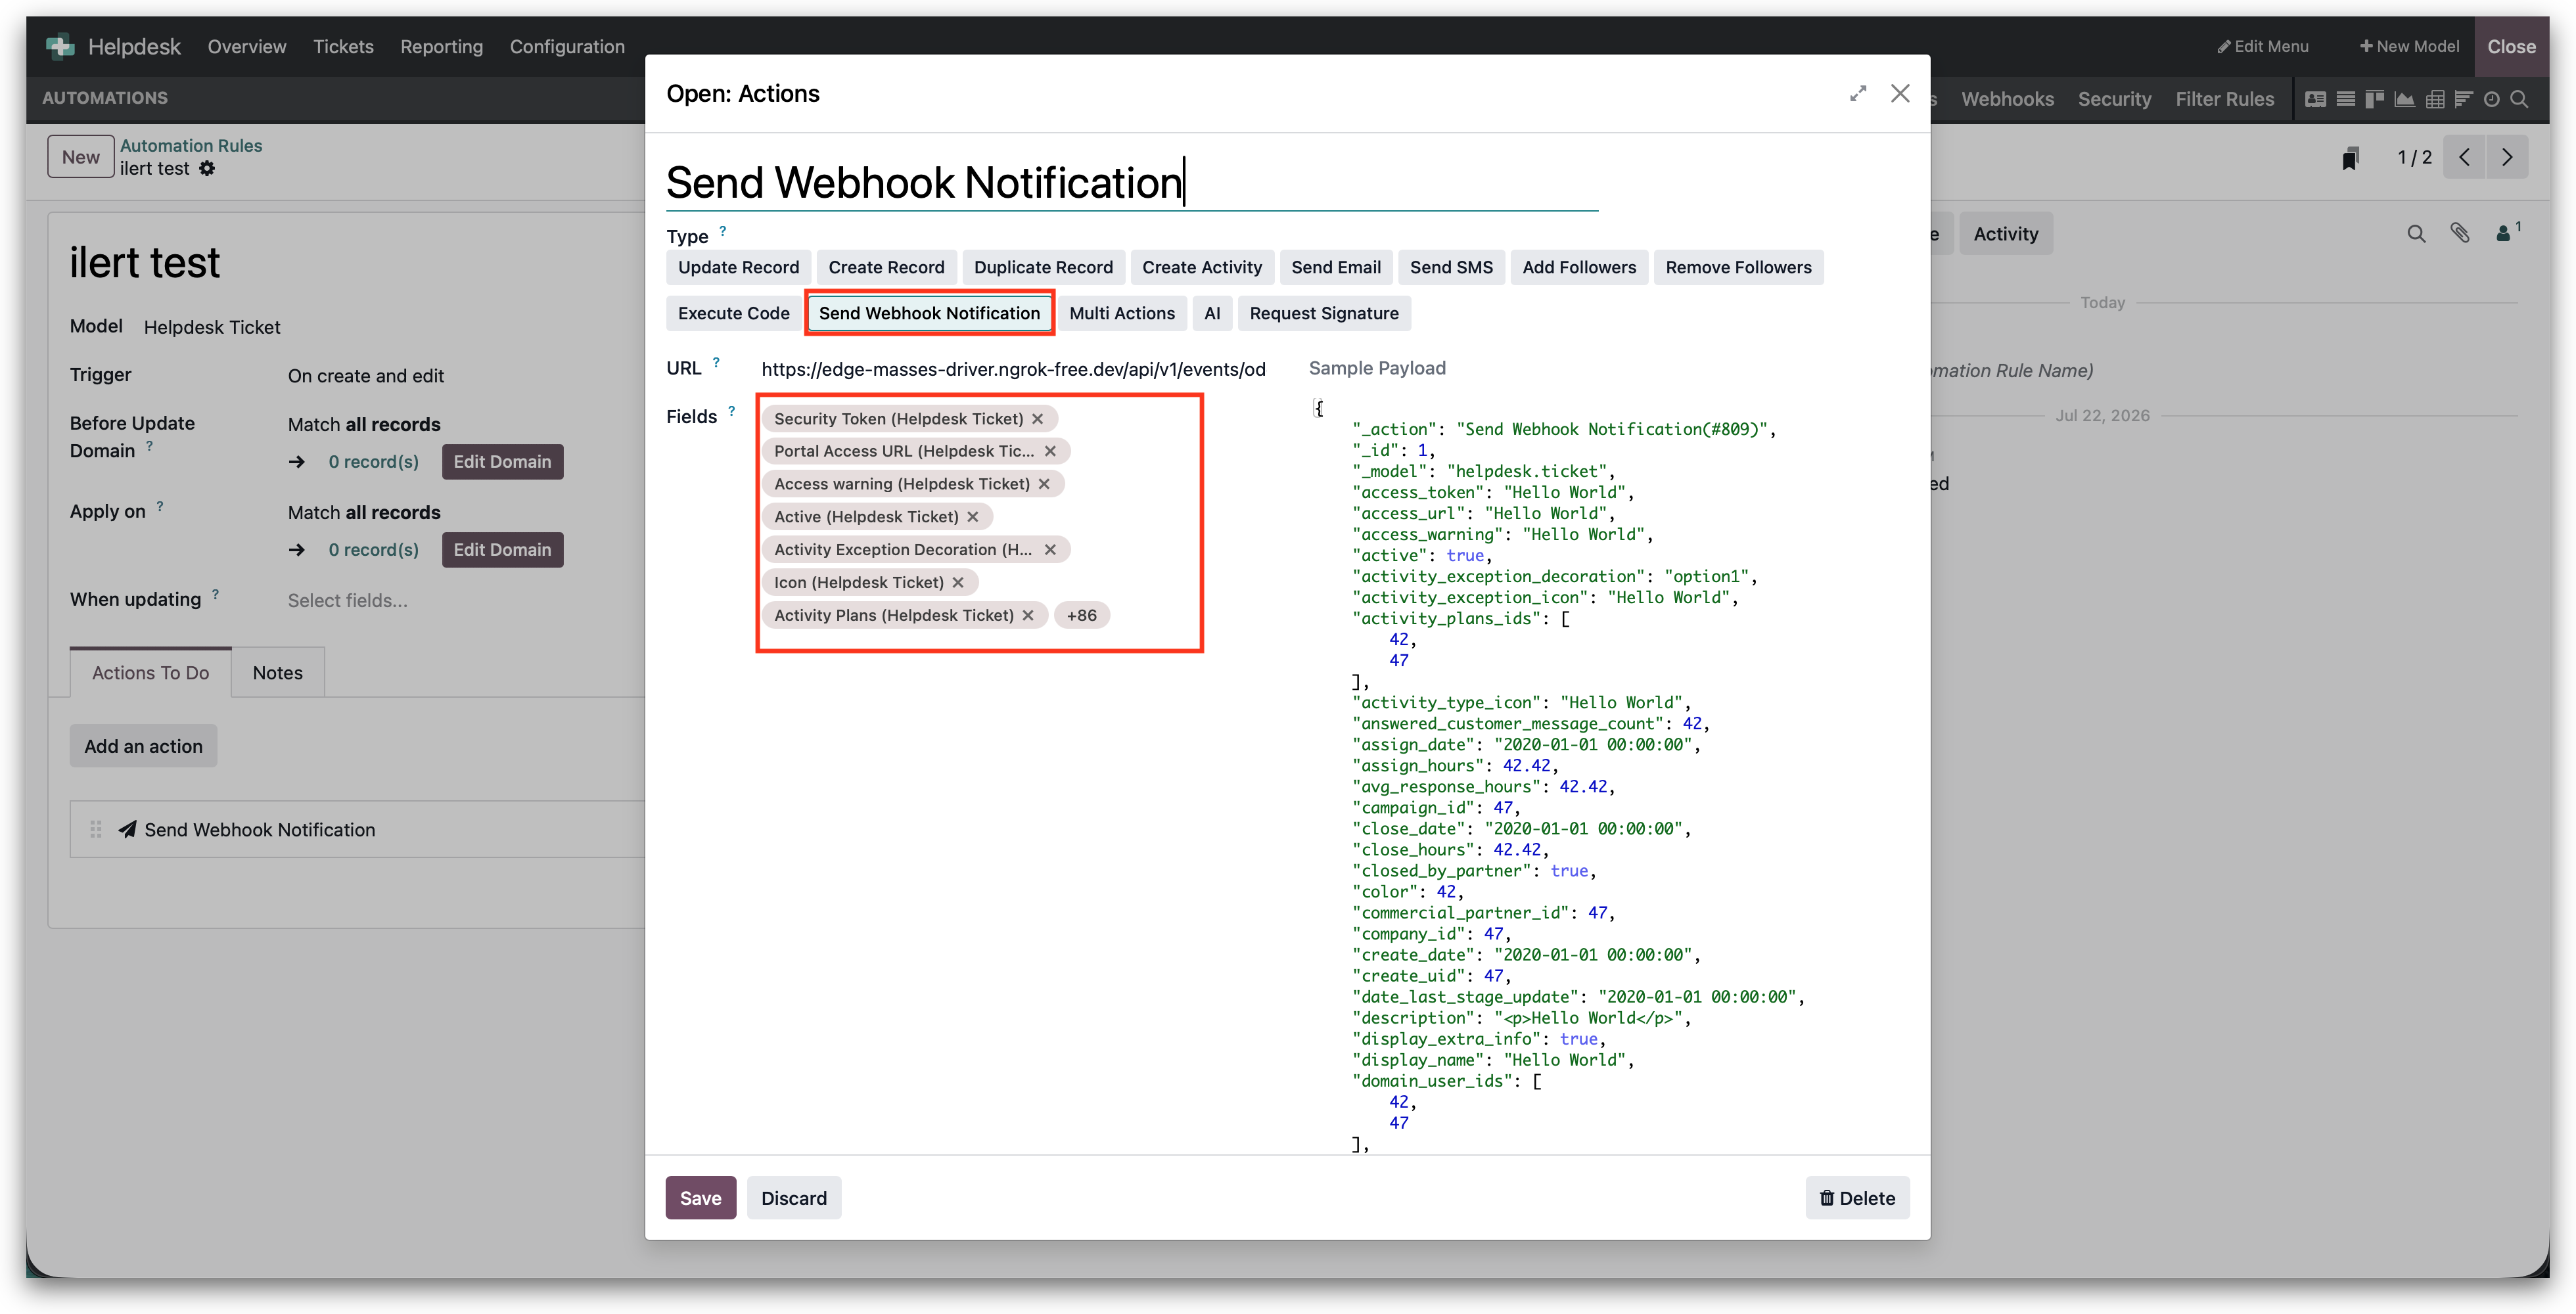
4. Under **Actions To Do**, click **Add an action** and choose the type **Send Webhook Notification**.
5. In the **URL** field, paste the **Odoo URL** that you copied from ilert.
6. In **Fields**, select the ticket fields that should be sent to ilert — for example subject, description, stage, priority, assignee and customer. The **Sample Payload** on the right shows what Odoo will post. Click **Save**.
That's it — tickets matching the rule now create alerts in ilert.
## In Odoo: Add the ticket URL to the payload (optional)
The webhook payload contains field values only, so the ticket does not carry an absolute link to itself. If you want the alert in ilert to link back to the Odoo ticket, add a custom field that holds the full URL and fill it with a second automation rule.
1. In Helpdesk leave Studio click on create a new ticket and then go back into studio. Studio's form editor needs an existing ticket to render the form.
2. Open **Views**.
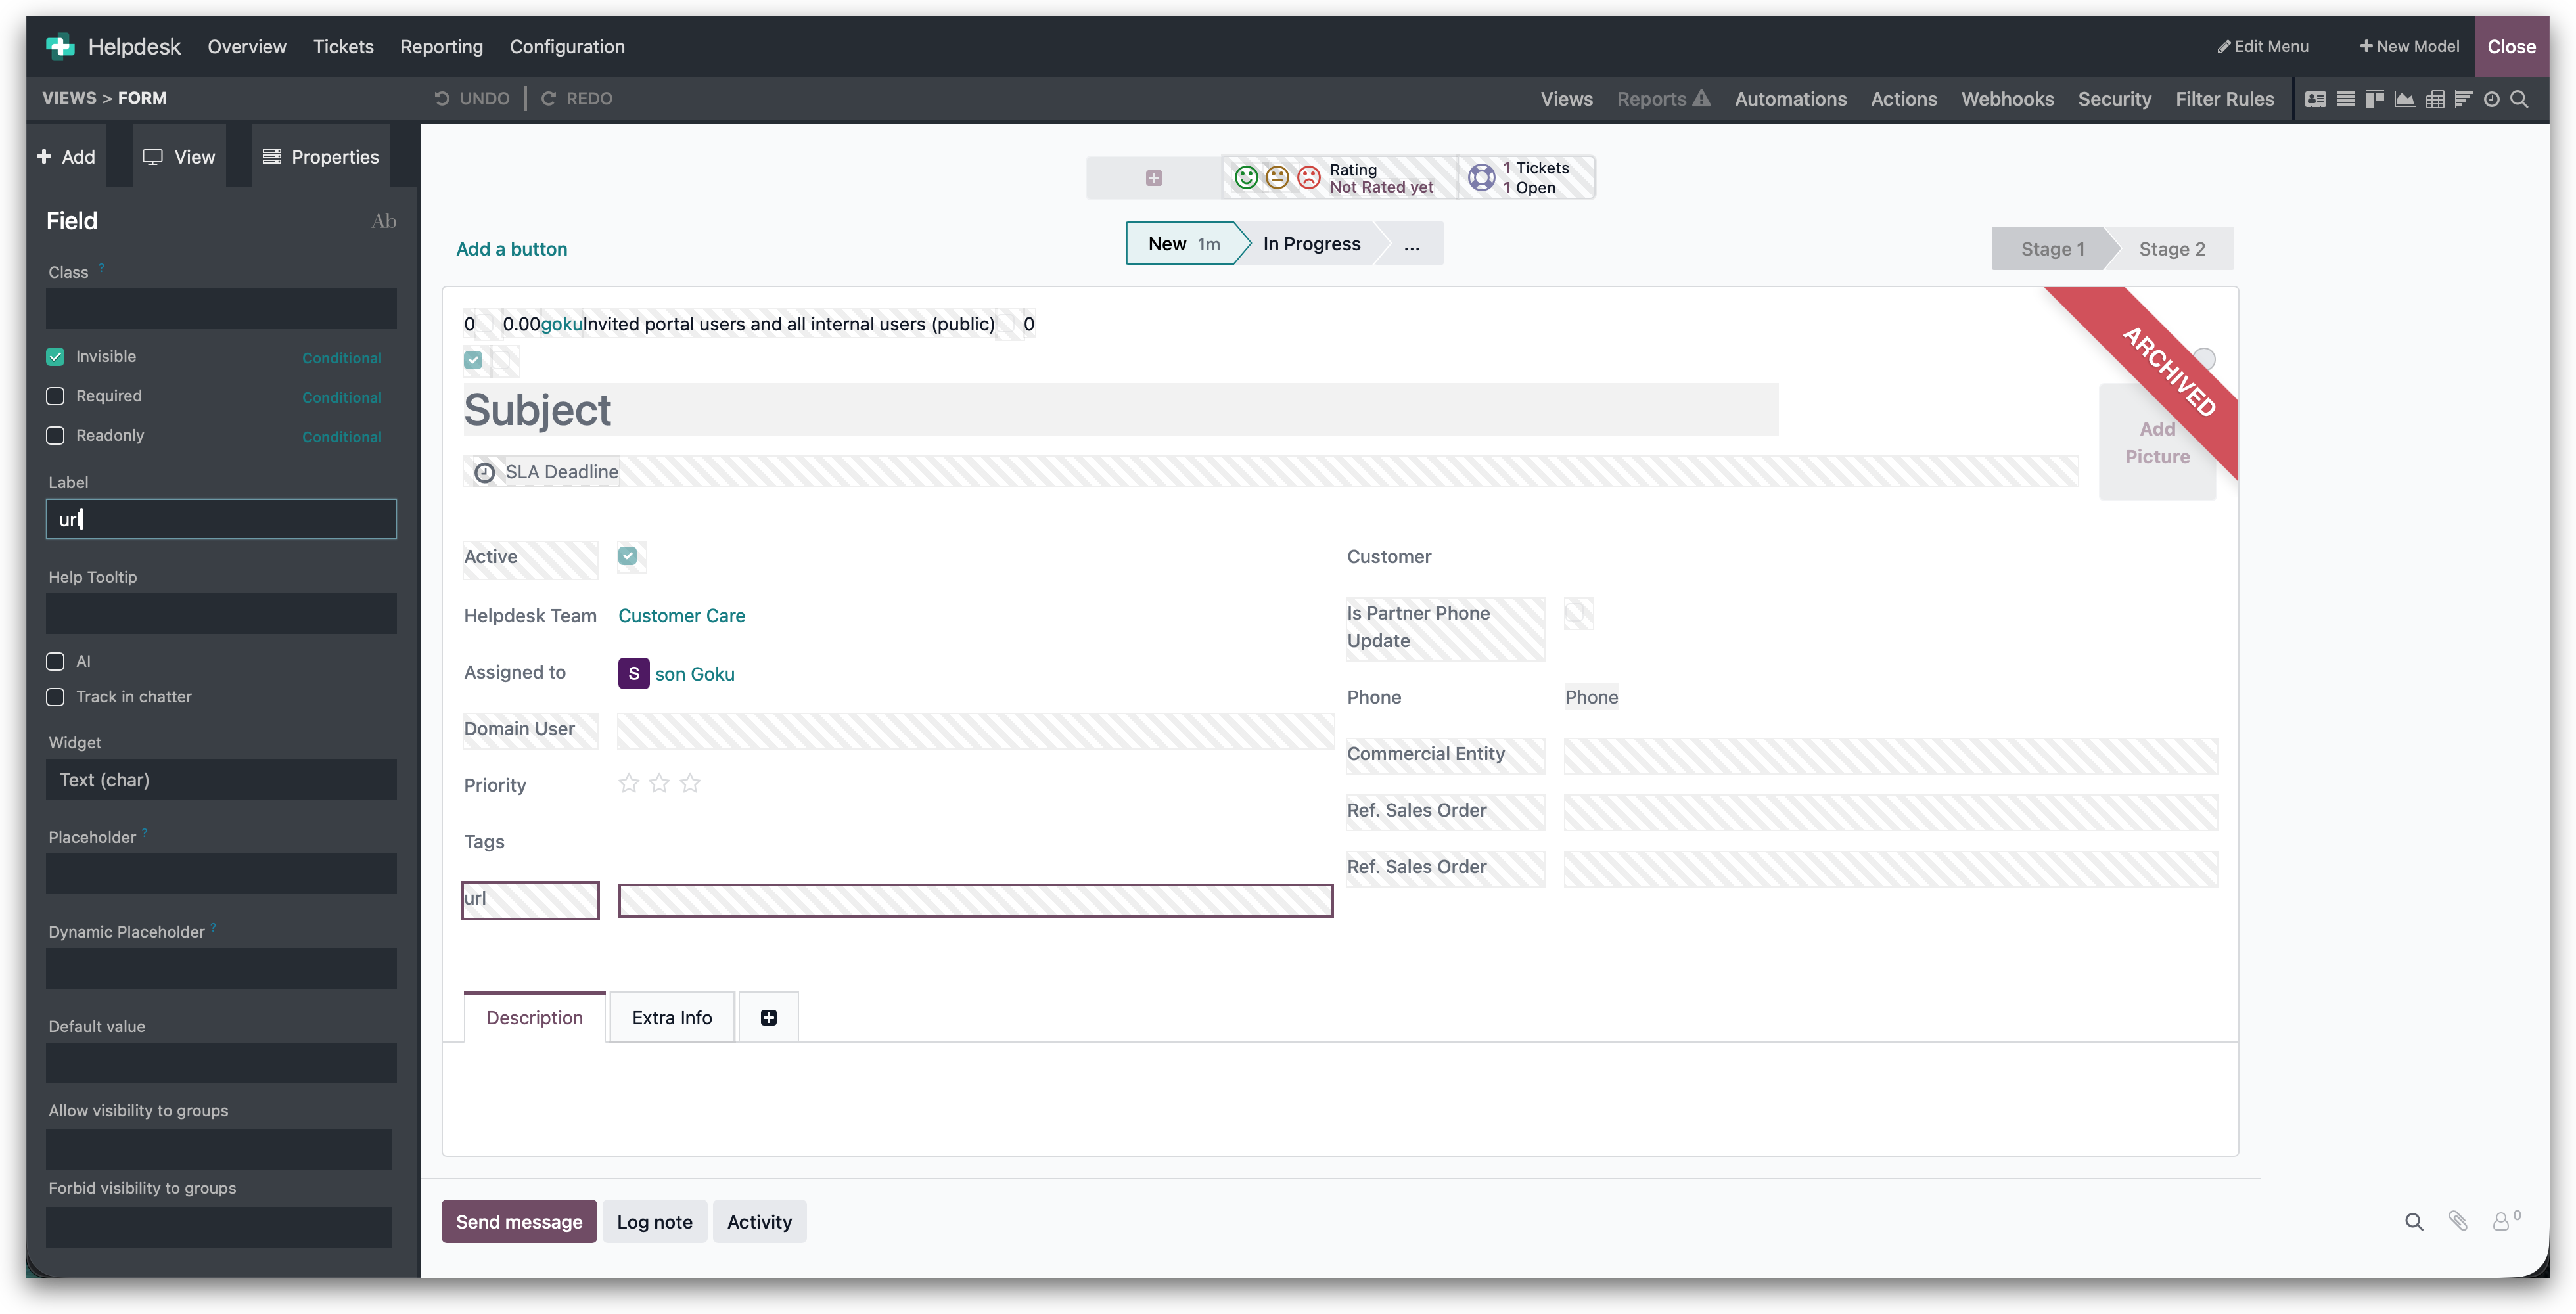
3. Drag a **Text** field onto the form and set its **Label** to `url`. Tick **Invisible** if you do not want to see the field on the ticket — it only needs to exist so it can be sent along with the webhook.
Odoo stores the field under the technical name `x_studio_url`, which is the name used in the code below.
4. Go back to **Automations** and click **New**. Give the rule a name, for example `get url`, and choose the same model and trigger as before.
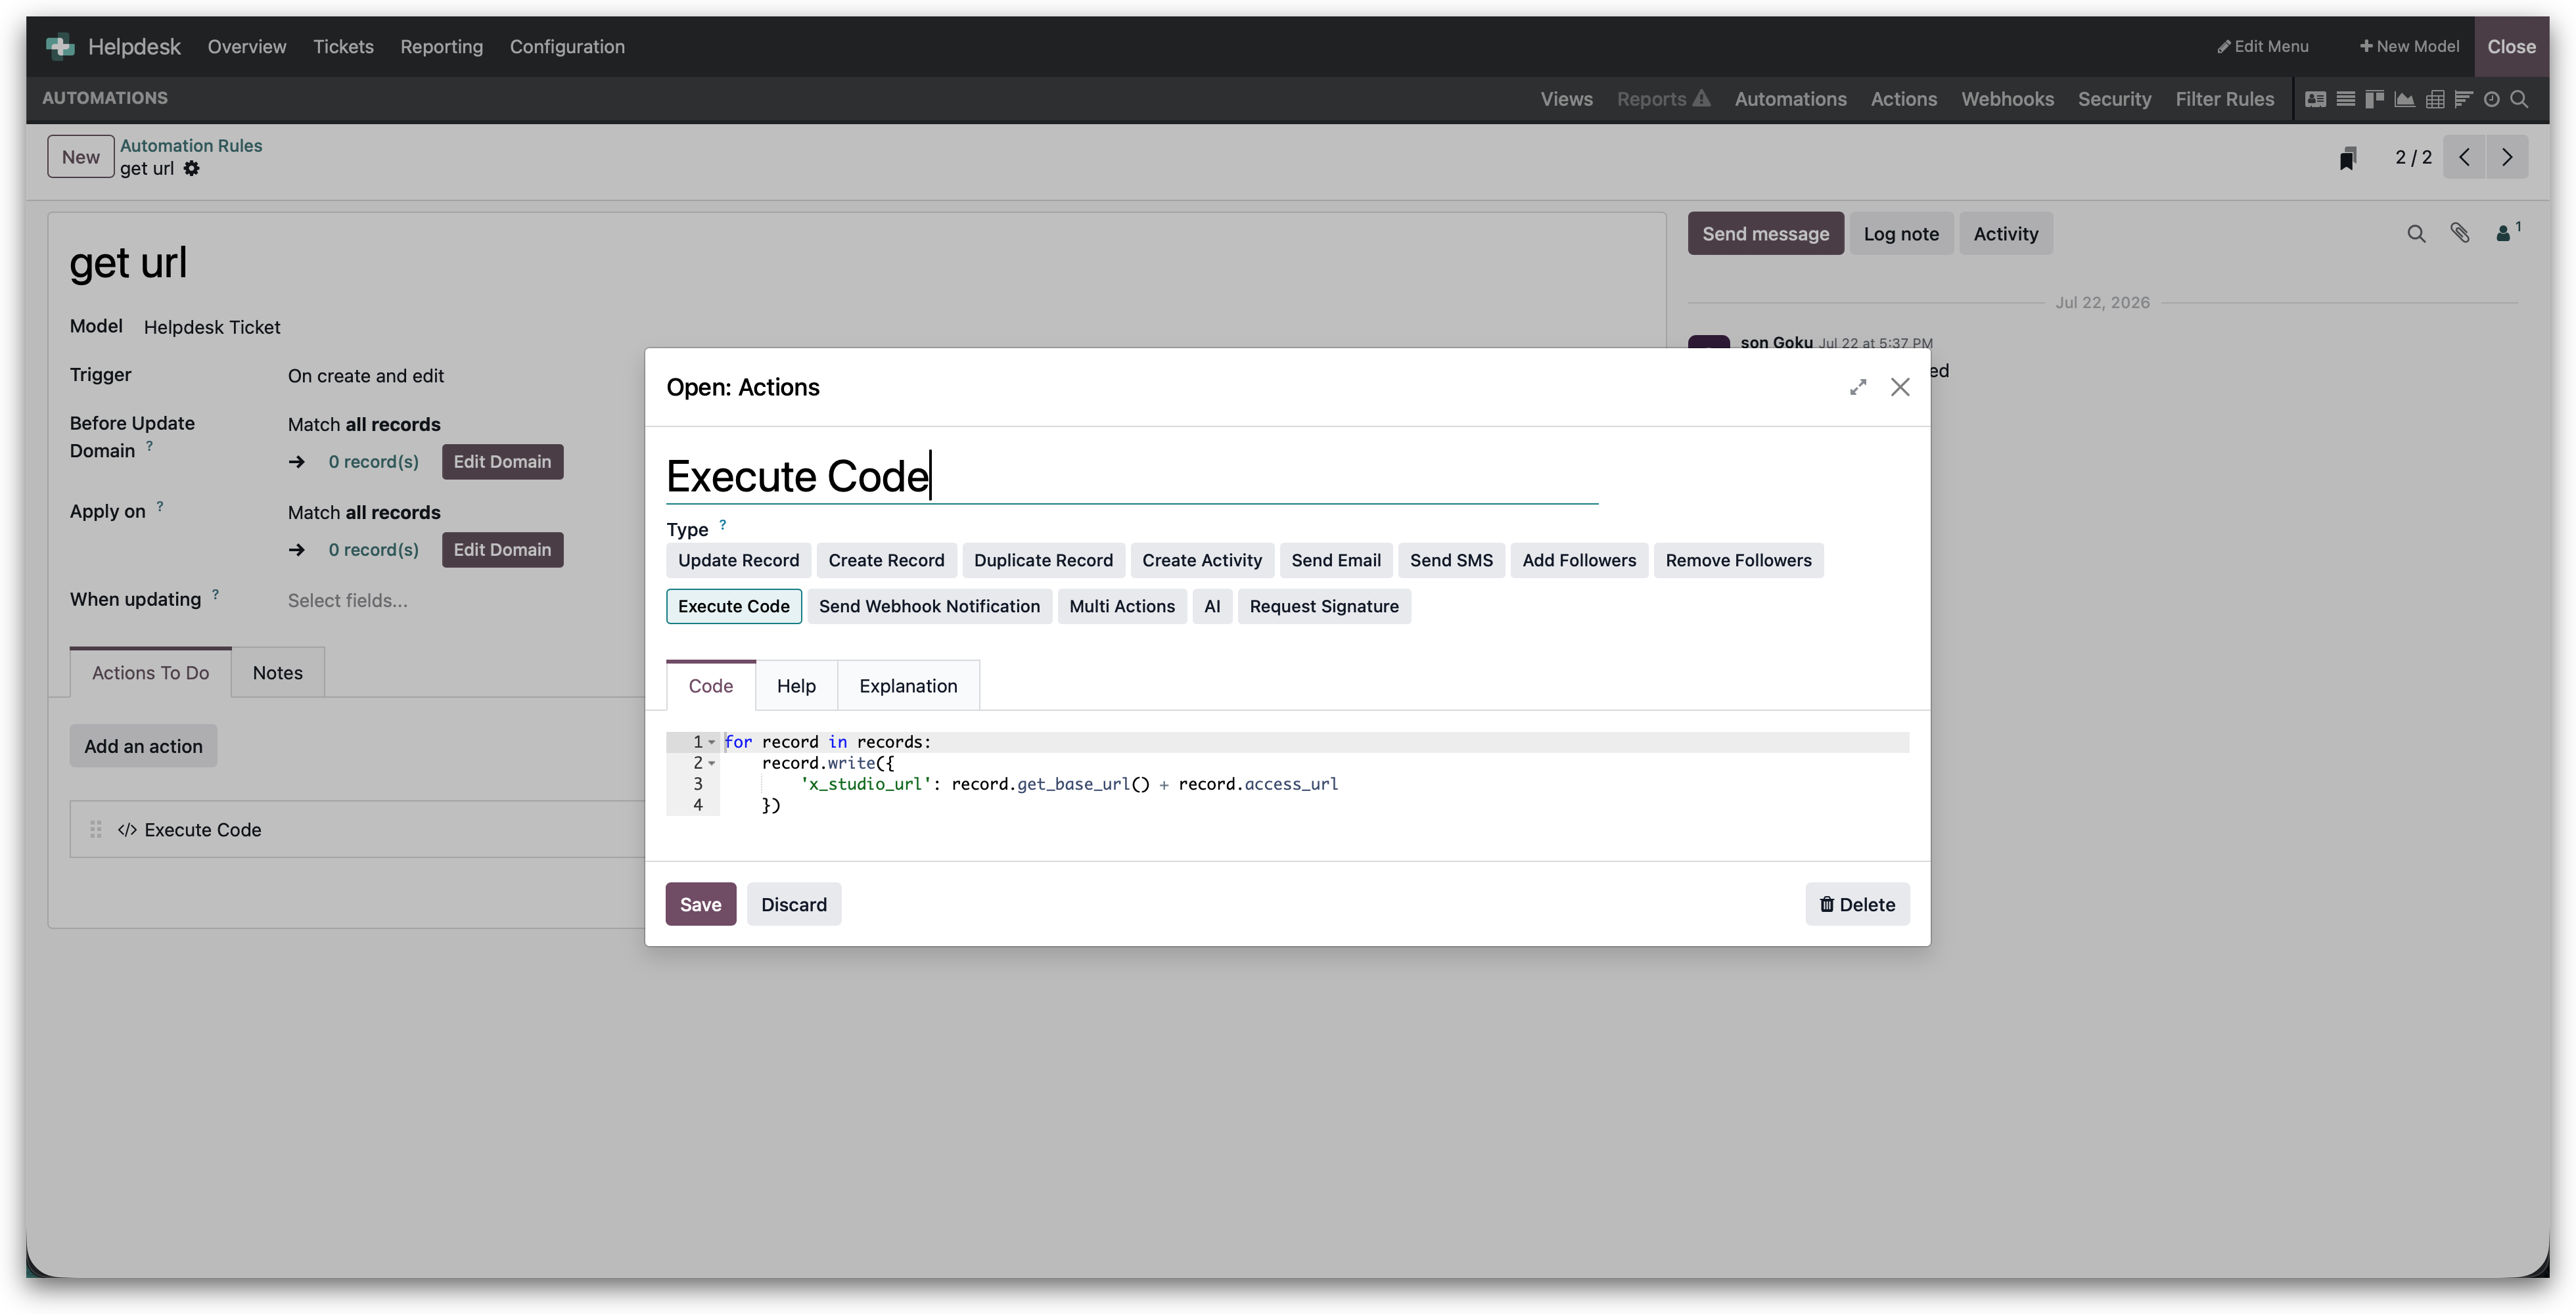
5. Under **Actions To Do**, click **Add an action**, choose the type **Execute Code**, paste the following code and click **Save**.
```python
for record in records:
record.write({
'x_studio_url': record.get_base_url() + record.access_url
})
```
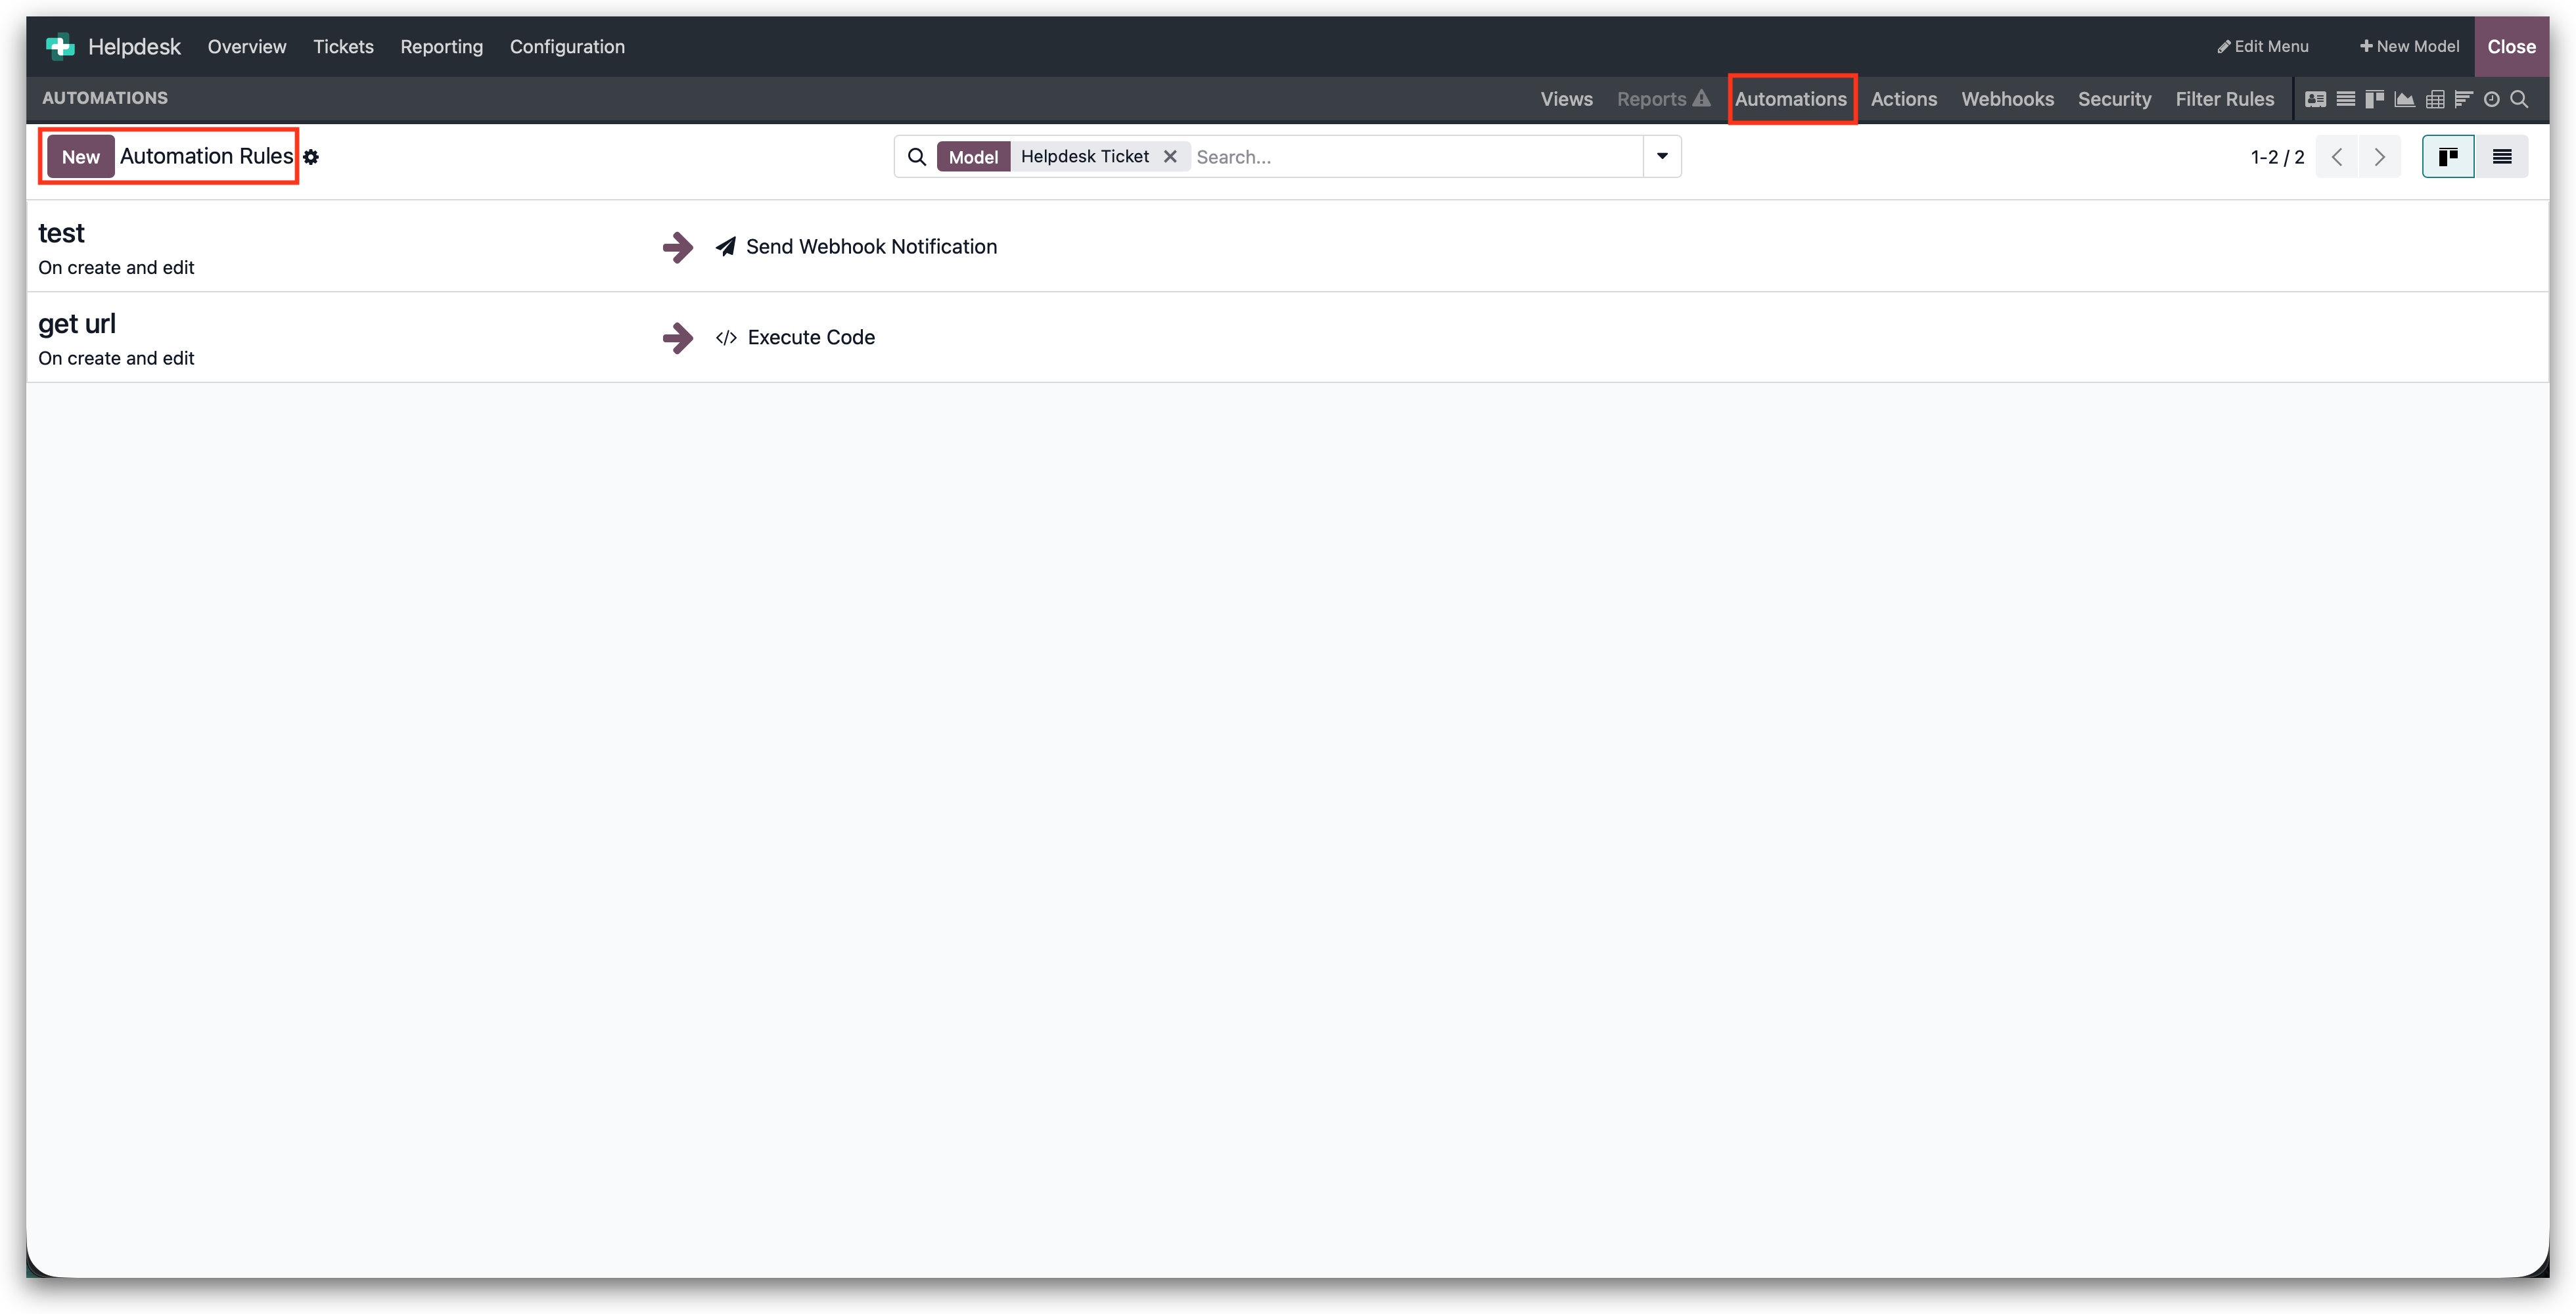
6. Both rules now show up in the **Automations** list of the Helpdesk Ticket model. Finally, open the webhook rule again and add the `url` field to its **Fields** selection so the link is included in the payload.
## FAQ
#### **Do I need Odoo Studio?**
Yes. The **Send Webhook Notification** action and the custom `url` field are both Studio features. Studio is available in Odoo Online and Odoo.sh plans that include it, as well as in Odoo Enterprise.
#### **Can I connect Odoo with multiple alert sources in ilert?**
Yes. Create an additional automation rule in Odoo for each alert source and point its webhook action at that alert source's Odoo URL.
#### **Can I use models other than Helpdesk Ticket?**
The integration is built around Odoo Helpdesk tickets. Automation rules on other models can post to the same URL, but their fields are not mapped.
---
# Agent Instructions
This documentation is published with GitBook. GitBook is the documentation platform designed so that both humans and AI agents can read, navigate, and reason over technical content effectively. Learn more at gitbook.com.
## Querying This Documentation
If you need additional information that is not directly available in this page, you can query the documentation by asking a question.
Perform an HTTP GET request on the following URL with the `ask` and `goal` query parameters:
```
GET https://docs.ilert.com/integrations/inbound-integrations/odoo.md?ask=&goal=
```
`ask` is the immediate question: it should be specific, self-contained, and written in natural language.
`goal` is what the user is ultimately trying to achieve, the reason they need the answer. Sharing it helps GitBook give you a better, more relevant answer. A goal is most helpful when it describes the outcome the user wants rather than restating the question. For example, with `ask=how do I create an API token`, a goal like `automate deployments from our CI pipeline` lets GitBook tailor the answer to that use case.
The response will contain a direct answer to the question and relevant excerpts and sources from the documentation.
Use this mechanism when the answer is not explicitly present in the current page, you need clarification or additional context, or you want to retrieve related documentation sections.