> For the complete documentation index, see [llms.txt](https://docs.ilert.com/llms.txt). Markdown versions of documentation pages are available by appending `.md` to page URLs; this page is available as [Markdown](https://docs.ilert.com/integrations/inbound-integrations/particle.md).
# Particle Integration
Create alerts in ilert from Particle alerts.
[Particle.io](https://www.particle.io) is a platform that provides everything necessary for organizations to develop, deploy, and manage their Internet of Things (IoT) products. It serves as a comprehensive ecosystem for connected device development with robust tools, APIs, and hardware kits. With Particle.io, you can build IoT devices at scale, delivering connectivity, device management, and security features out-of-the-box.
ilert's integration for Particle enables users to receive alerts from their devices via SMS, push, voice, and messenger notifications. It helps to connect Particle devices with other services and tools in the tech stack and speed up incident response.
## In ilert: Create a Particle alert source
1. Go to **Alerting** → **Alert sources** and click **Create new alert source**.
2. Search for **Particle**, click its tile, and click **Next**.
3. Give your alert source a name, optionally assign teams, and click **Next**.
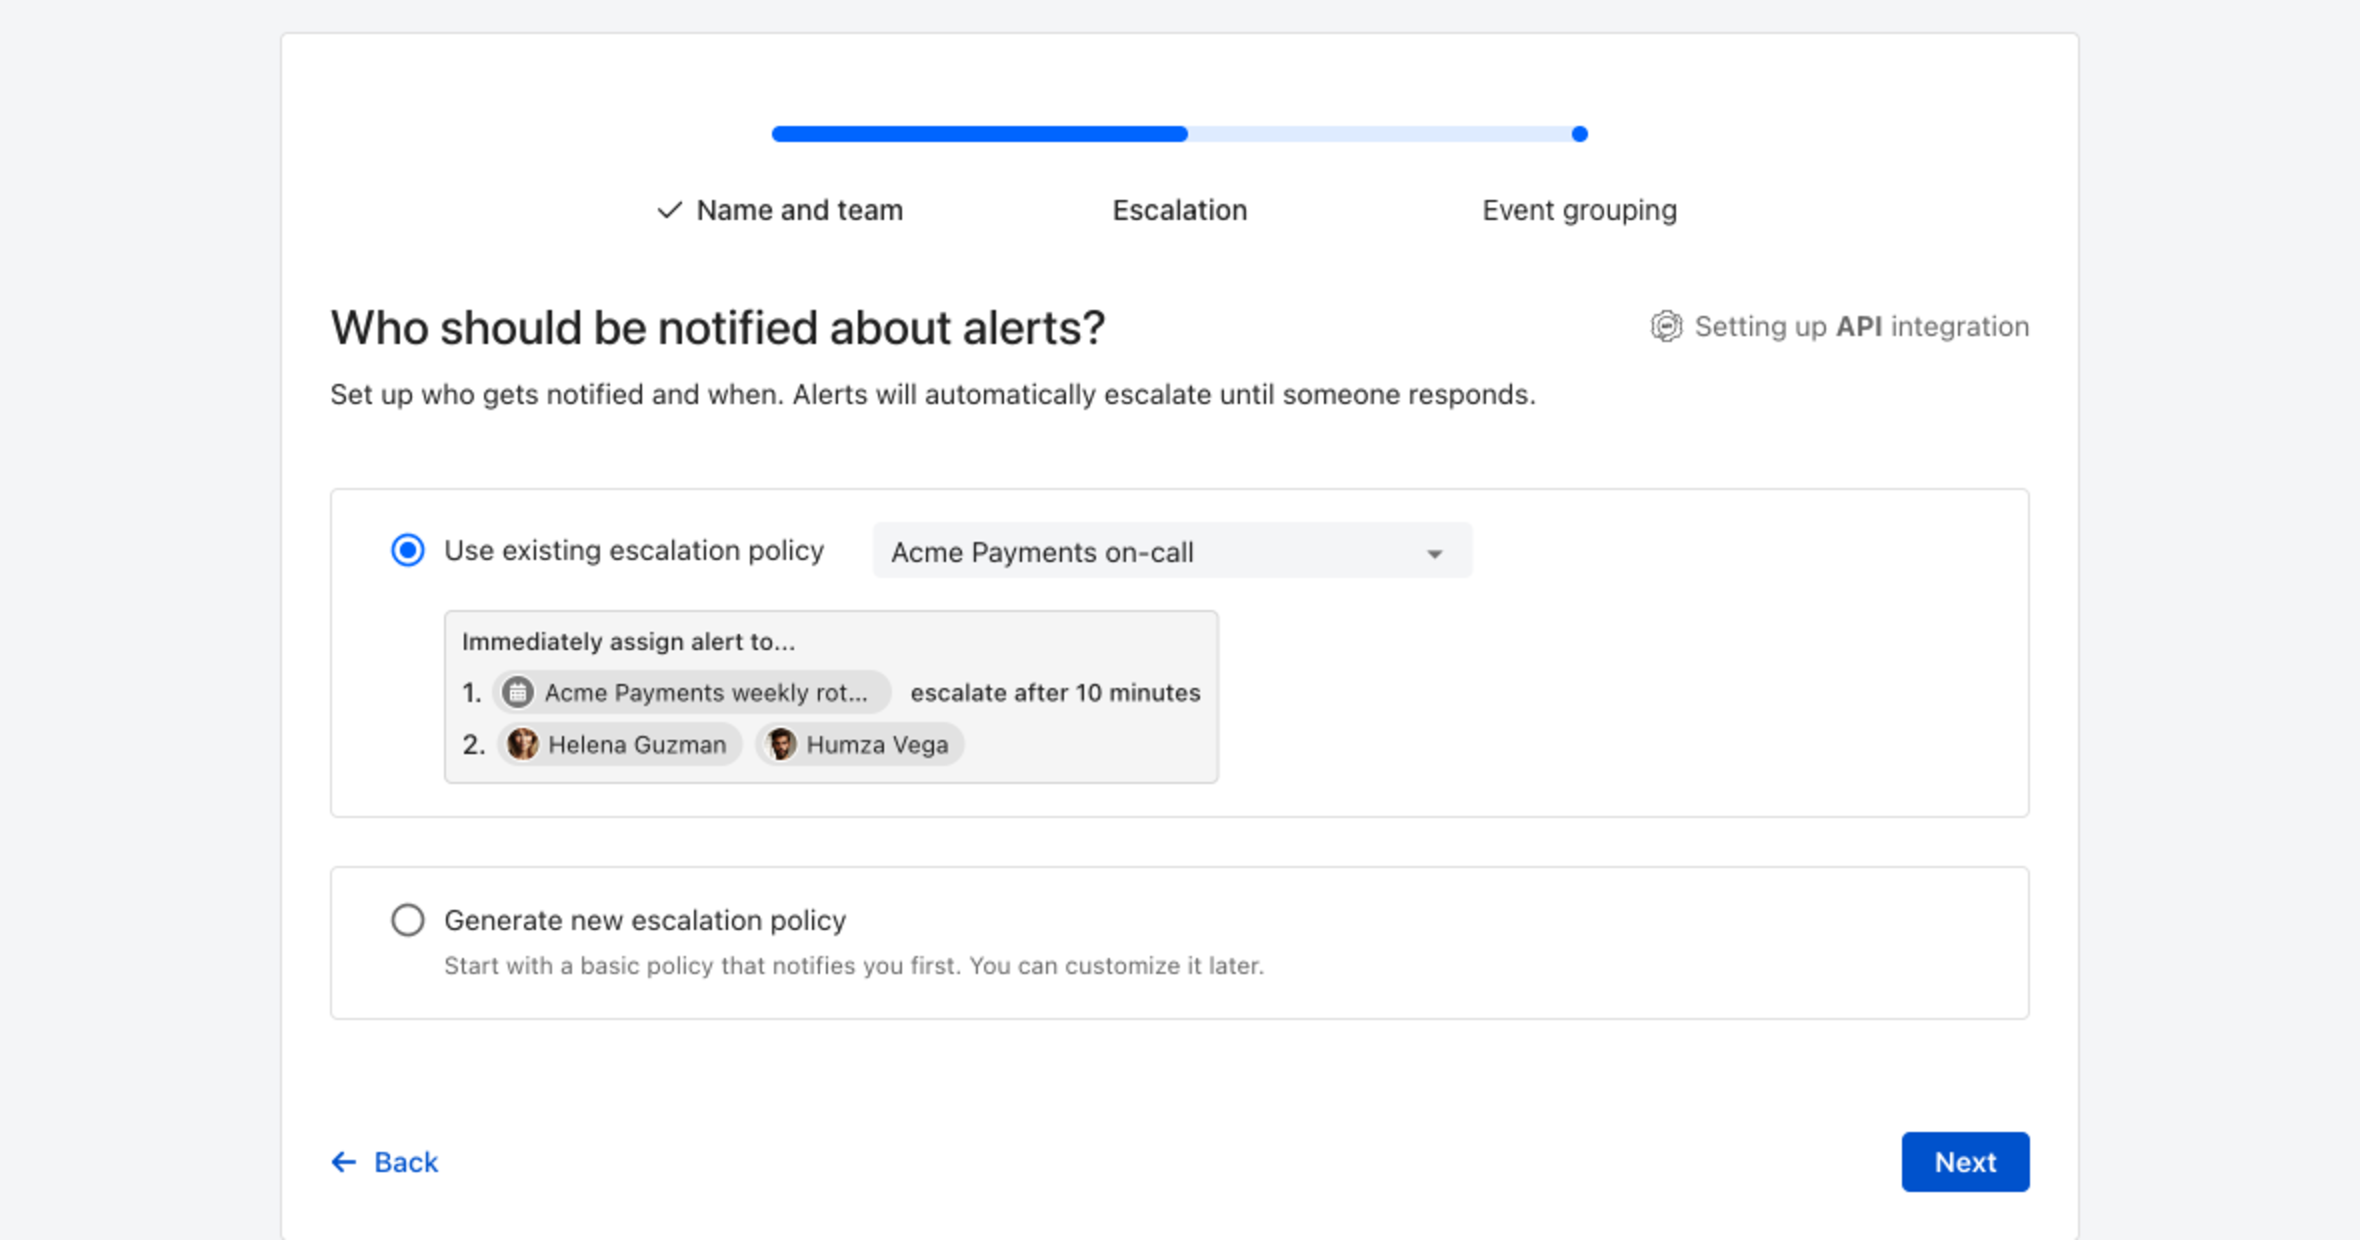
4. Choose who gets notified: select **Use existing escalation policy** and pick a policy, or **Generate new escalation policy** to start with a basic one that notifies you first. Click **Next**.
Pick an existing escalation policy, or generate a basic one without leaving the wizard.
5. Select **Default grouping** and click **Continue setup**. It groups events by the alert key the integration sets; the other [grouping options](/alerting/configure-alerting/alert-sources.md#event-grouping) are easier to judge once events are arriving.
6. The next page shows more settings, such as notification priority and alert templates. Click **Finish setup** for now; you can change them later.
7. On the final page, ilert shows the integration key and URL for this alert source. You will need them later in this guide.
## In Particle: Create a Webhook
1. In the sidebar click on **Integrations**.
2. Now click on **ADD NEW INTEGRATION**.
3. Click on **Webhook**, to create a new webhook integration.
4. Enter a **Name**, an **Event Name**(ALERT or RESOLVE) and the [previous](#in-ilert-create-a-particle-alert-source) generated ilert webhook URL into the **URL** field.
5. Change the **Request Type** to **POST** and open the **Advanced Settings**.
{% tabs %}
{% tab title="ALERT" %}
{% endtab %}
{% tab title="RESOLVE" %}
{% endtab %}
{% endtabs %}
6. Select **Default**. (for custom json data follow this [step](#in-particle-custom-json-data))
7. Click on **SAVE**.
8. Optional: Click on **TEST** to test the integration.
## Custom Webhooks
### In Particle: Custom json data
1. Under Advanced Settings choose **Custom** for **JSON DATA**.
2. Create a template using the Particle [documentation](https://docs.particle.io/reference/cloud-apis/webhooks/). (it is also possible to add own customized values)
### In ilert: Create a custom template
1. Go to the alert source edit view.
2. Under **Alert template** enable **Alert summary** and **Alert details**.
3. For a detailed guide on how to use our alert templating click [here](/alerting/configure-alerting/alert-sources.md#alert-template).
4. Use the payload keys created in this [step](#in-particle-custom-json-data) to create the alert template.
## FAQ
**Will alerts in ilert be resolved automatically?**
Yes, as soon as a webhook integration is sending an RESOLVE event, the alert in ilert will be fixed. To create RESOLVE events, follow the [guide](#in-particle-create-a-webhook) and use RESOLVE as Event Name.
---
# Agent Instructions
This documentation is published with GitBook. GitBook is the documentation platform designed so that both humans and AI agents can read, navigate, and reason over technical content effectively. Learn more at gitbook.com.
## Querying This Documentation
If you need additional information that is not directly available in this page, you can query the documentation by asking a question.
Perform an HTTP GET request on the following URL with the `ask` and `goal` query parameters:
```
GET https://docs.ilert.com/integrations/inbound-integrations/particle.md?ask=&goal=
```
`ask` is the immediate question: it should be specific, self-contained, and written in natural language.
`goal` is what the user is ultimately trying to achieve, the reason they need the answer. Sharing it helps GitBook give you a better, more relevant answer. A goal is most helpful when it describes the outcome the user wants rather than restating the question. For example, with `ask=how do I create an API token`, a goal like `automate deployments from our CI pipeline` lets GitBook tailor the answer to that use case.
The response will contain a direct answer to the question and relevant excerpts and sources from the documentation.
Use this mechanism when the answer is not explicitly present in the current page, you need clarification or additional context, or you want to retrieve related documentation sections.