> For the complete documentation index, see [llms.txt](https://docs.ilert.com/llms.txt). Markdown versions of documentation pages are available by appending `.md` to page URLs; this page is available as [Markdown](https://docs.ilert.com/users-and-access-management/single-sign-on/setting-up-sso-with-azure-active-directory.md).
# Setting up SSO with Microsoft Entra ID
Connect ilert to Microsoft Entra ID over SAML 2.0, including the claim change that makes ilert receive the right email address.
Microsoft Entra ID is the identity service formerly called Azure Active Directory. If your admin center still says Azure AD, this guide still applies — the field names are the same.
**Prerequisites**
* The [Pro plan](https://www.ilert.com/pricing) or higher
* The **account owner** role in ilert — no other role can change login authentication
* Cloud Application Administrator, Application Administrator, or ownership of the service principal in Entra ID
## Open the ilert side first
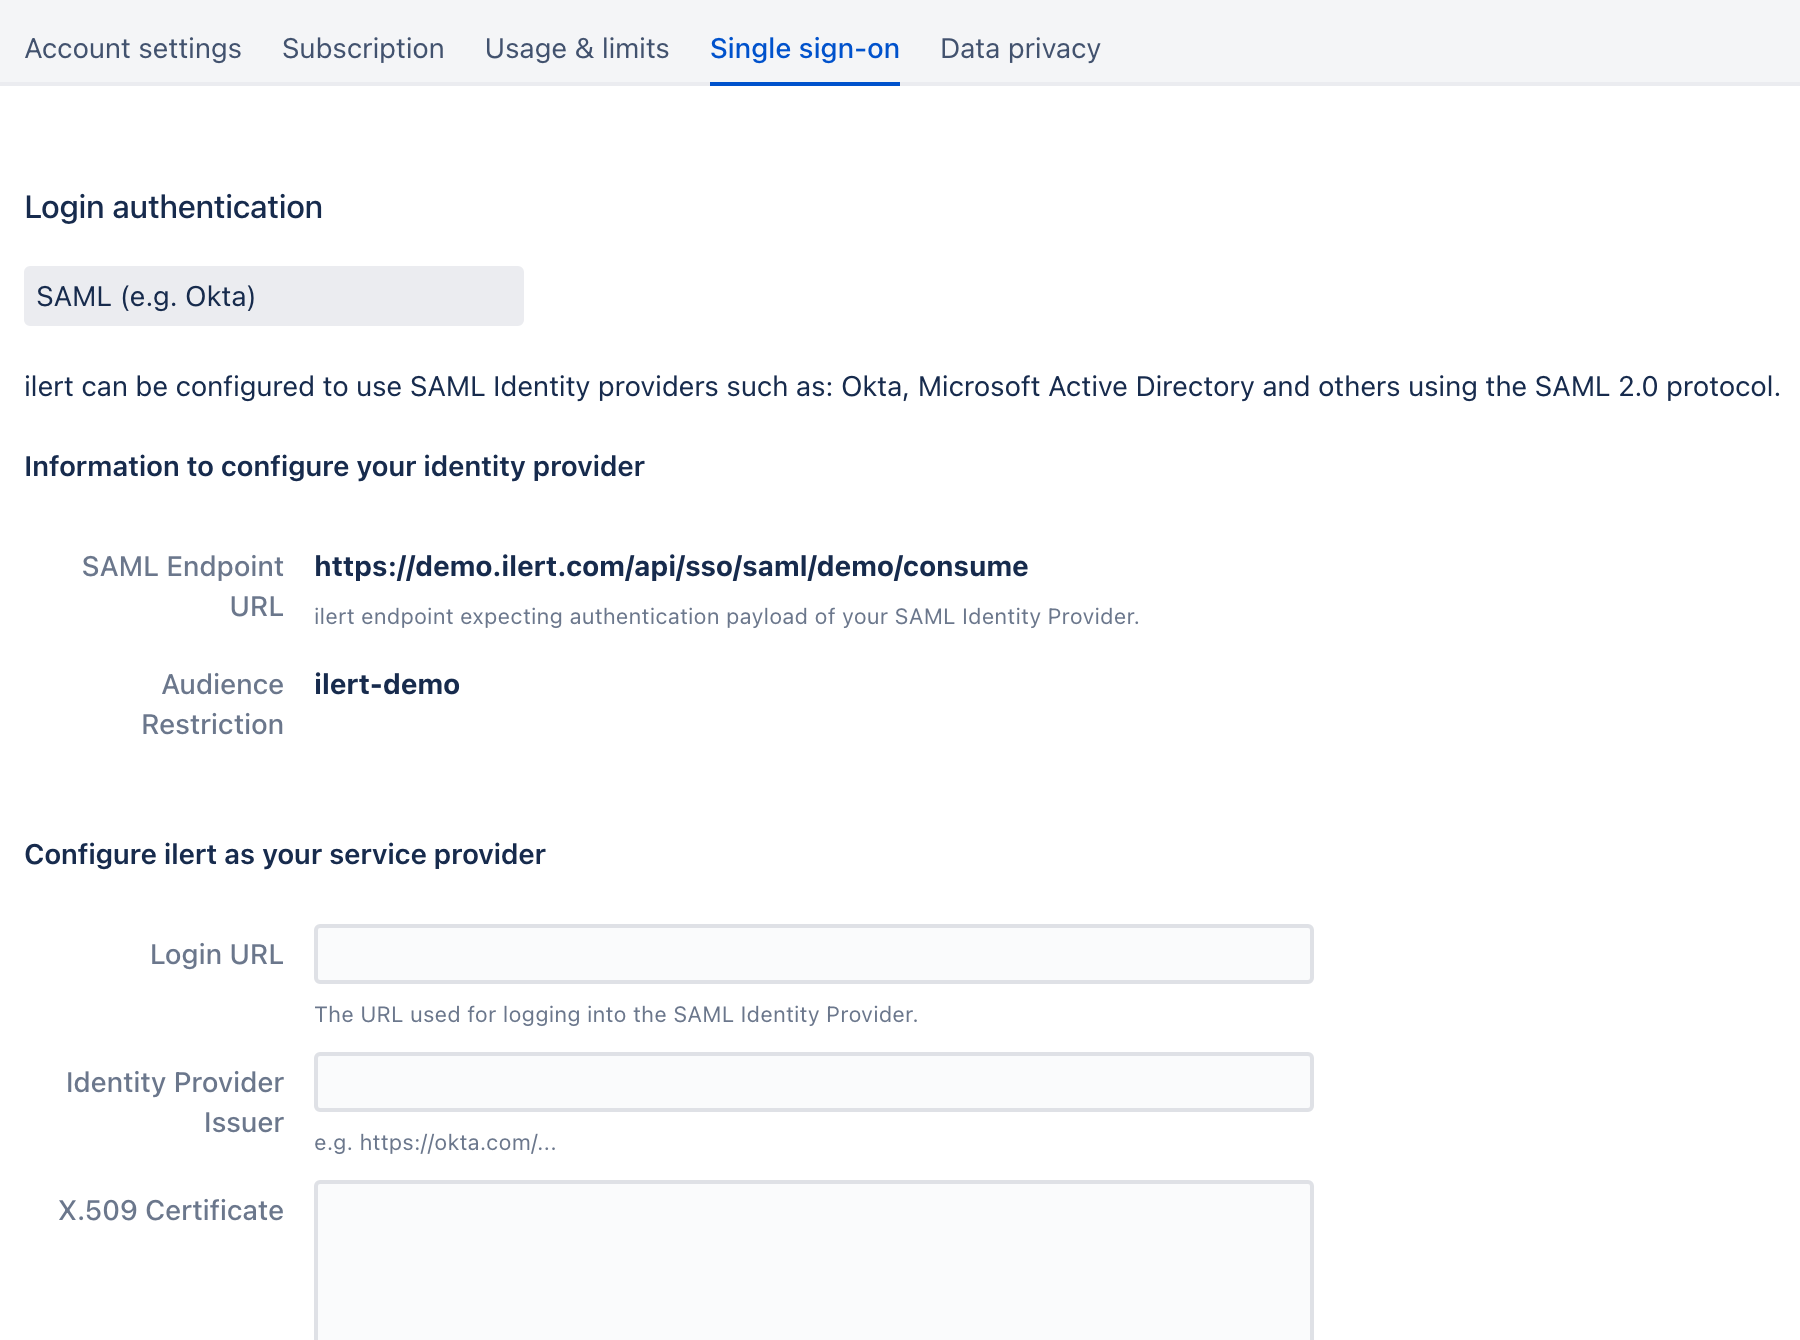
In the sidebar, go to **Settings** → **Account settings** → **Single sign-on** and choose **SAML (e.g. Okta)** from the dropdown. That option covers every SAML 2.0 provider, Entra ID included.
Under **Information to configure your identity provider**, ilert shows two read-only values. Entra ID needs both:
| ilert shows | Looks like |
| ------------------------ | -------------------------------------------------- |
| **SAML Endpoint URL** | `https://acme.ilert.com/api/sso/saml/acme/consume` |
| **Audience Restriction** | `ilert-acme` |
ilert hands over the top two values and expects the bottom three back.
## Create the application in Entra ID
{% stepper %}
{% step %}
### Add a non-gallery application
In the Microsoft Entra admin center, go to **Entra ID** → **Enterprise apps** → **All applications** and click **New application**. Choose **Create your own application**, name it `ilert`, and select **Integrate any other application you don't find in the gallery**.
{% endstep %}
{% step %}
### Turn on SAML single sign-on
Open the new application, select **Single sign-on** in the **Manage** section, and choose **SAML**.
{% endstep %}
{% step %}
### Fill in the basic SAML configuration
Click **Edit** on **Basic SAML Configuration** and paste the two values from ilert:
| Entra ID field | Value |
| ------------------------------------------ | -------------------------------- |
| Identifier (Entity ID) | ilert's **Audience Restriction** |
| Reply URL (Assertion Consumer Service URL) | ilert's **SAML Endpoint URL** |
Click **Save** and close the panel.
{% endstep %}
{% step %}
### Point the name identifier at the user's email
This step matters more than it looks. By default Entra ID sends `user.principalname` as the unique identifier, which is often not the person's email address — and ilert matches users by email.
Open **Attributes & Claims**, click **Unique User Identifier (Name ID)**, and set the **Source attribute** to `user.mail`. Save and close.
{% endstep %}
{% step %}
### Download the certificate
In the **SAML Certificates** section, download **Certificate (Base64)**. You will paste the contents of that file, not the file itself, into ilert.
{% endstep %}
{% endstepper %}
## Copy Entra ID's values back into ilert
The **Set up ilert** section of the single sign-on page holds the values ilert needs, under **Configure ilert as your service provider**:
| Entra ID gives you | Paste it into ilert's |
| --------------------------------------- | ---------------------------- |
| Login URL | **Login URL** |
| Microsoft Entra Identifier | **Identity Provider Issuer** |
| Contents of the Base64 certificate file | **X.509 Certificate** |
Open the downloaded certificate in a text editor and paste everything, including the `-----BEGIN CERTIFICATE-----` and `-----END CERTIFICATE-----` lines.
Click **Save** in ilert.
## Assign users to the application
Nobody can sign in until they are assigned. In the application, open **Users and groups**, click **Add user/group**, select the users or groups who should reach ilert, and confirm.
To verify, have one assigned user open [app.ilert.com](https://app.ilert.com), click **Login with SSO**, and enter your ilert subdomain. They should land in ilert without typing a password.
## Optional settings
These sit below the provider fields on the ilert **Single sign-on** tab.
| Setting | What it does |
| ------------------------------------------ | ---------------------------------------------------------------------------------------------------------------------------------------------------------------------------------------------------------------------------------------------------------------------------------- |
| **Provision new users on first sso login** | Creates the ilert user automatically on first successful sign-in, with the **Responder** role. Requires a free seat of that kind. Pass [additional attributes](/users-and-access-management/single-sign-on/auto-provisioning-users-and-teams.md) to set the role and team instead. |
| **Allow login with username and password** | Turn it off to require SSO for everyone except the account owner. Read the warning below first. |
| **Check provisioning attribute** | Restricts auto-provisioning to responses carrying a named SAML attribute. See [auto provisioning](/users-and-access-management/single-sign-on/auto-provisioning-users-and-teams.md#preventing-unwanted-auto-provisioning). |
| **Compress AuthnRequests** | Deflates the authentication request. Only if your Entra ID configuration requires it. |
| **Longer sessions** | Keeps users signed in longer, as though they had ticked **Keep me logged in**. |
{% hint style="warning" %}
**Test before you turn off password login.**
With **Allow login with username and password** cleared, a misconfigured SAML setup stops everyone signing in except the account owner, who can still use a password in the web app. Sign in through Entra ID in a private browser window first, and only then clear the checkbox.
{% endhint %}
## Pass roles and teams from Entra ID
Beyond the name identifier, Entra ID can send claims that set an ilert user's role, team, and profile details at provisioning time.
{% content-ref url="/pages/-MUDUwi7p1W7fdZyonRf" %}
[Auto provisioning users & teams](/users-and-access-management/single-sign-on/auto-provisioning-users-and-teams.md)
{% endcontent-ref %}
---
# Agent Instructions
This documentation is published with GitBook. GitBook is the documentation platform designed so that both humans and AI agents can read, navigate, and reason over technical content effectively. Learn more at gitbook.com.
## Querying This Documentation
If you need additional information that is not directly available in this page, you can query the documentation by asking a question.
Perform an HTTP GET request on the following URL with the `ask` and `goal` query parameters:
```
GET https://docs.ilert.com/users-and-access-management/single-sign-on/setting-up-sso-with-azure-active-directory.md?ask=&goal=
```
`ask` is the immediate question: it should be specific, self-contained, and written in natural language.
`goal` is what the user is ultimately trying to achieve, the reason they need the answer. Sharing it helps GitBook give you a better, more relevant answer. A goal is most helpful when it describes the outcome the user wants rather than restating the question. For example, with `ask=how do I create an API token`, a goal like `automate deployments from our CI pipeline` lets GitBook tailor the answer to that use case.
The response will contain a direct answer to the question and relevant excerpts and sources from the documentation.
Use this mechanism when the answer is not explicitly present in the current page, you need clarification or additional context, or you want to retrieve related documentation sections.