> For the complete documentation index, see [llms.txt](https://docs.ilert.com/llms.txt). Markdown versions of documentation pages are available by appending `.md` to page URLs; this page is available as [Markdown](https://docs.ilert.com/users-and-access-management/two-factor-authentication-mfa.md).
# Two-factor authentication / MFA
Protect an ilert account with an authenticator app or a security key, and know how to get back in when the device is lost.
Two-factor authentication asks for a second proof of identity — a generated code or a security key — every time you sign in. Every ilert user can turn it on, on every plan. Each user sets it up for themselves; there is no account-wide switch that turns it on for everyone.
{% hint style="warning" %}
**Set up an authenticator app, even if you use a security key.**
Recovery codes are issued only when you set up an authenticator app. A security key on its own leaves you with no way back in if the key is lost — the only remedy is contacting ilert support and proving your identity. Set up both, and the app becomes your backup.
{% endhint %}
## Set up an authenticator app
{% stepper %}
{% step %}
### Open your security settings
Click your avatar in the navigation bar, choose **My profile**, and open the **Security** tab.
{% endstep %}
{% step %}
### Start the setup
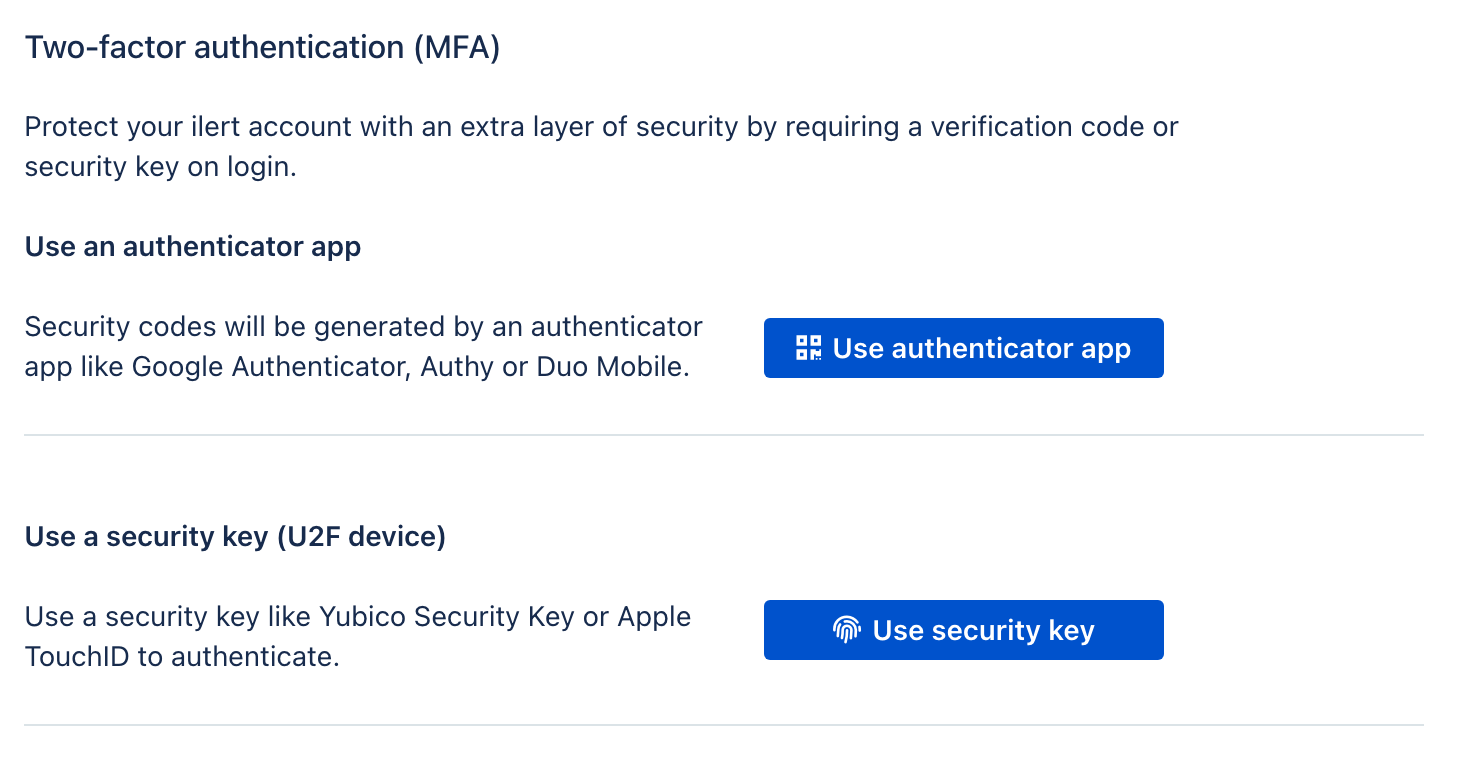
Under **Two-factor authentication (MFA)**, click **Use authenticator app**.
{% endstep %}
{% step %}
### Scan the barcode
Scan it with your authenticator app. If you cannot scan — no camera, or you are setting this up on the same device — use the plain-text secret shown below the barcode instead.
{% endstep %}
{% step %}
### Enter a code and confirm
Type the 6-digit code your app generates and click **Confirm setup**. ilert asks you to verify a second time to activate 2FA.
{% endstep %}
{% step %}
### Save your recovery codes
ilert shows five recovery codes. Store them somewhere you can reach without this account — a password manager, or on paper. They are shown once.
{% endstep %}
{% endstepper %}
Both methods start from here, and you can have both active at once.
To confirm it worked, sign out and sign back in. ilert should ask for a code before letting you through.
## Add a security key
Under **Two-factor authentication (MFA)**, click **Use security key**. This covers hardware tokens such as a Yubico Security Key, and also the biometric authenticators built into devices you already own — Touch ID, Face ID, Windows Hello, or a double-tap on an Apple Watch. Anything supporting [WebAuthn](https://www.w3.org/TR/webauthn-2/) works.
You register the key, then verify with it once more to activate. **Being asked twice is expected**, not a failed attempt.
You can have both an authenticator app and a security key active at the same time, and choose between them at sign-in.
## Authenticator apps
Any TOTP app works. These are the common ones:
| App | iOS | Android |
| ----------------------- | ------------------------------------------------------------------------------ | ---------------------------------------------------------------------------------------------------------------- |
| Google Authenticator | [App Store](https://apps.apple.com/de/app/google-authenticator/id388497605) | [Play Store](https://play.google.com/store/apps/details?id=com.google.android.apps.authenticator2\&hl=en\&gl=US) |
| Duo Mobile | [App Store](https://apps.apple.com/de/app/duo-mobile/id422663827) | [Play Store](https://play.google.com/store/apps/details?id=com.duosecurity.duomobile\&hl=en\&gl=US) |
| Authy | [App Store](https://apps.apple.com/de/app/twilio-authy/id494168017) | [Play Store](https://play.google.com/store/apps/details?id=com.authy.authy\&hl=en\&gl=US) |
| Microsoft Authenticator | [App Store](https://apps.apple.com/de/app/microsoft-authenticator/id983156458) | [Play Store](https://play.google.com/store/apps/details?id=com.azure.authenticator\&hl=en\&gl=US) |
## Signing in with 2FA active
ilert asks for a code after your password. Tick **Trust this browser (ask for verification less often)** to be asked for a code less frequently on that browser — it does not switch 2FA off, and it applies to that browser only.
If you cannot produce a code, click **Lost your app or device?** on the verification screen and enter a recovery code instead.
## Turn 2FA off
Open **My profile** → **Security** and click **Remove 2FA**. ilert asks you to verify, returns you to the page, and you click **Remove 2FA** a second time to finish.
{% hint style="info" %}
Removing 2FA verifies twice, which is why doing it with recovery codes consumes **two** of your five.
{% endhint %}
## See who has 2FA enabled
Admins and the account owner can check coverage across the account. Go to **Settings** → **Users** and set the **2FA Status** filter to **Enabled** or **Disabled**.
Set 2FA Status to Disabled to list everyone still unprotected.
ilert has no account-wide switch that requires 2FA, so this filter is how you find the people who still need to set it up.
## Recovery
### I lost my authenticator app or device
Sign in with one of your five recovery codes. Each code works once and is spent as soon as it is used.
Once you are in, **remove 2FA and set it up again on your new device**. Do this immediately rather than continuing to sign in on recovery codes — removal itself needs two of them, so waiting until you have one left means you can no longer get out of the situation on your own.
### I have no recovery codes, or I only used a security key
Ask an admin in your account to clear it for you — see below. Only if nobody can, contact [ilert support](/knowledge-base/contact.md). Resetting 2FA through support requires proof of identity, such as a passport, because the check that normally protects the account is the one that has failed.
### Clearing 2FA for someone else
Admins can clear another user's 2FA without support. Go to **Settings** → **Users**, click the user, and click **Remove 2FA** under **2FA**.
| Whose 2FA | Who can clear it |
| ------------------- | ------------------------------------------------------------------------ |
| A regular user's | Any admin, or the account owner |
| Another admin's | The account owner only |
| The account owner's | Nobody in the account — [ilert support](/knowledge-base/contact.md) only |
The user sets 2FA up again from scratch afterwards, with new recovery codes.
{% hint style="danger" %}
**The account owner is the single point of failure.**
Nobody in your account can clear the account owner's 2FA. If the account owner loses both their authenticator app and their recovery codes, recovery goes through support and identity verification. Make sure whoever holds that role has recovery codes stored somewhere durable and separate from their phone.
{% endhint %}
---
# Agent Instructions
This documentation is published with GitBook. GitBook is the documentation platform designed so that both humans and AI agents can read, navigate, and reason over technical content effectively. Learn more at gitbook.com.
## Querying This Documentation
If you need additional information that is not directly available in this page, you can query the documentation by asking a question.
Perform an HTTP GET request on the following URL with the `ask` and `goal` query parameters:
```
GET https://docs.ilert.com/users-and-access-management/two-factor-authentication-mfa.md?ask=&goal=
```
`ask` is the immediate question: it should be specific, self-contained, and written in natural language.
`goal` is what the user is ultimately trying to achieve, the reason they need the answer. Sharing it helps GitBook give you a better, more relevant answer. A goal is most helpful when it describes the outcome the user wants rather than restating the question. For example, with `ask=how do I create an API token`, a goal like `automate deployments from our CI pipeline` lets GitBook tailor the answer to that use case.
The response will contain a direct answer to the question and relevant excerpts and sources from the documentation.
Use this mechanism when the answer is not explicitly present in the current page, you need clarification or additional context, or you want to retrieve related documentation sections.