> For the complete documentation index, see [llms.txt](https://docs.ilert.com/llms.txt). Markdown versions of documentation pages are available by appending `.md` to page URLs; this page is available as [Markdown](https://docs.ilert.com/integrations/inbound-integrations/zabbix/script.md).
# Zabbix 2.2 – 4.3 Integration
The ilert Zabbix Integration helps you to easily connect ilert with Zabbix.
## System Requirements
{% hint style="info" %}
Are you using Zabbix 4.4 or higher? Please refer our [Zabbix 4.4+ Integration](/integrations/inbound-integrations/zabbix/native.md) guide.
{% endhint %}
* Zabbix 2.2 - 3.x
* Python 3.x
## In ilert: Create a Zabbix alert source
1. Go to **Alerting** → **Alert sources** and click **Create new alert source**.
2. Search for **Zabbix**, click its tile, and click **Next**.
3. Give your alert source a name, optionally assign teams, and click **Next**.
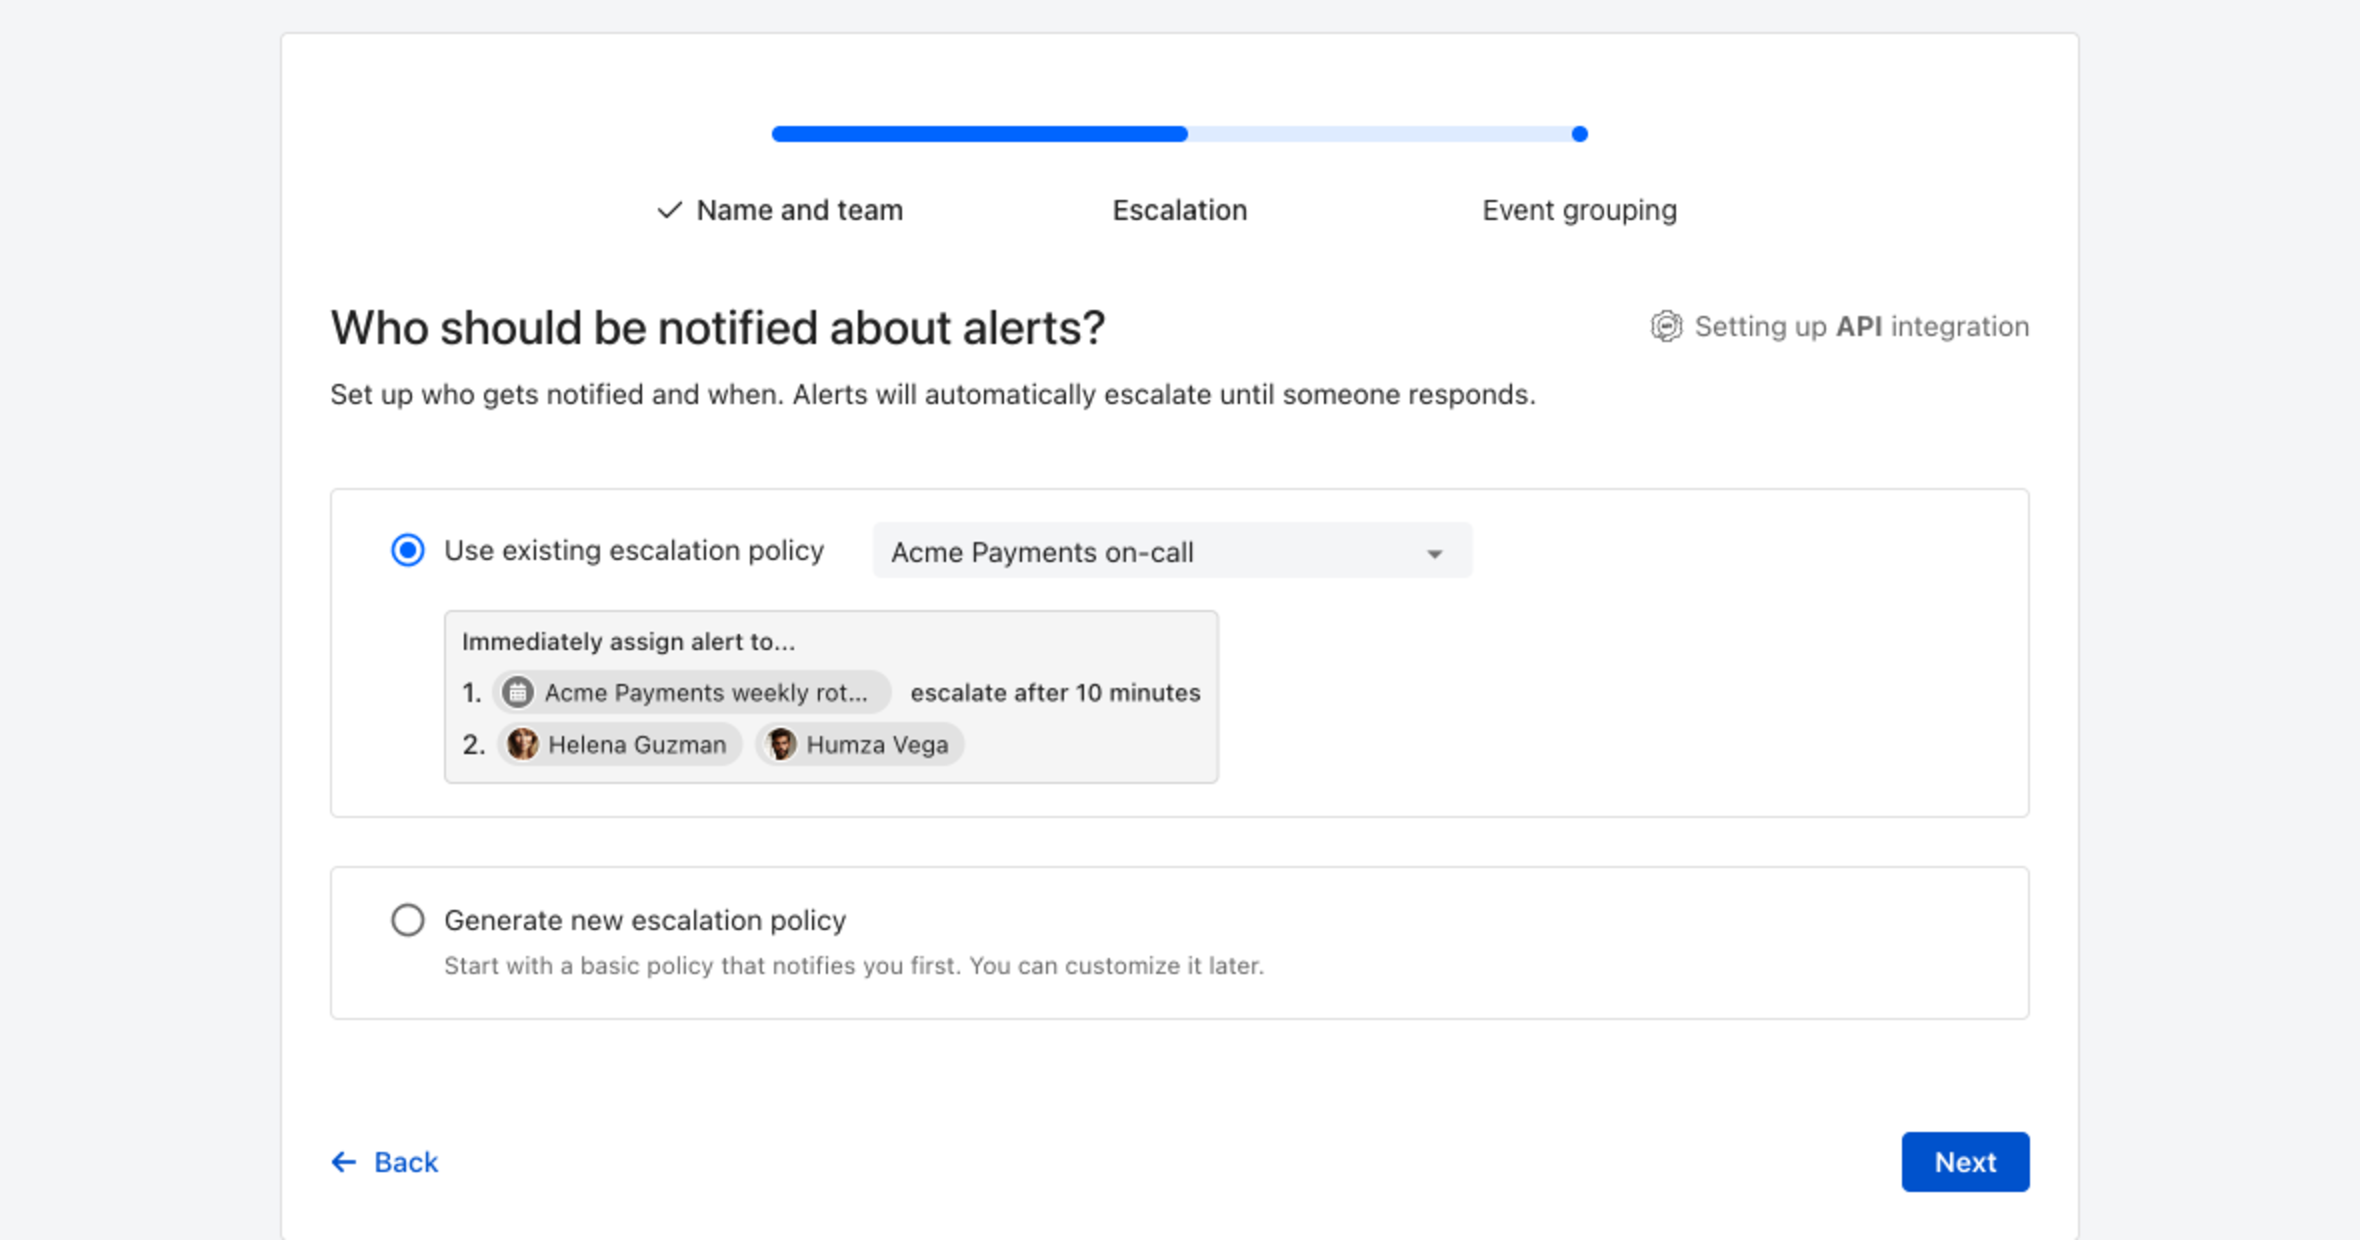
4. Choose who gets notified: select **Use existing escalation policy** and pick a policy, or **Generate new escalation policy** to start with a basic one that notifies you first. Click **Next**.
Pick an existing escalation policy, or generate a basic one without leaving the wizard.
5. Select **Default grouping** and click **Next**. The wizard then asks **Enable two-way alert status sync?** Decide whether status changes should also flow back to Zabbix, and click **Continue setup**.
6. The next page shows more settings, such as notification priority and alert templates. Click **Finish setup** for now, or **Continue setup** if you turned two-way sync on.
7. On the final page, ilert shows the integration key and URL for this alert source. You will need them later in this guide.
## In Zabbix: Download the Zabbix plugin
1. Download the ilert Zabbix plugin script. The script must be executable by both Zabbix and the cron daemon:
```
> wget https://raw.githubusercontent.com/iLert/ilert-zabbix/master/ilert-zabbix.py
> chmod 755 ilert-zabbix.py
```
1. Move the plugin into the `AlertsScriptsPath` directory. Typically, this is the `/usr/local/share/zabbix/alertscripts` or `/usr/lib/zabbix/alertscripts`.
When in doubt, check the file `zabbix_server.conf`.
```
> mv ilert-zabbix.py /usr/lib/zabbix/alertscripts/
```
### Create ilert media type
1. Go to the **Administration → Media types** tab and click the **Create media type** button.

1. On the **media type** configuration page, enter "iLert" as name, select "Script" as **type** and `ilert-zabbix.py` as **script name** .

1. Add three **script parameters** by clicking on **Add** three times and enter the following macros in the specified order.
**Note:** This step is not necessary in Zabbix 2.2 , because in this version these three script parameters are passed by default.
* `{ALERT.SENDTO }`
* `{ALERT.SUBJECT }`
* `{ALERT.MESSAGE }`

1. Click the **Add** button to save the media type.
### Create ilert user and group
1. Go to the **Administration → User groups** tab and click the **Create user group** button.

1. Set the name for the ilert group (eg "ilert group").

1. Switch to the **Permissions** tab and select the **host groups** that the ilert group should have read access to send notifications. Without read access, ilert cannot receive notifications for the hosts in the group (see also [here](https://www.zabbix.com/documentation/3.4/manual/quickstart/notification)).
2. Click the Add button to save the group.

1. Switch to the Users tab and click the **Create user** button.

1. Assign **alias** and **name** and add the user to the ilert group. No further details such as password are necessary as this user will not log in to Zabbix.

1. Switch to the **Media** tab and click the **Add** link

1. In the **media** window, select ilert as **Type** , enter the API key generated above in the **Send to** field and click the **Add** button

1. Click the **Add** button in the **Users** tab to save the user.
### Create an alert action
1. Switch to the **Configuration → Actions** tab and click the **Create action** button

1. Give the action a name, eg "ilert notifications".

1. Perform the following actions on the **Operations**, **Recovery operations** and **Acknowledgment operations** tabs
2. Fill in the default subject and default message exactly as shown below.
3. Click on the New link under Operations and select the ilert group created above under Send to User groups . Then click on the Add link.
**Operations**
* **Default subject** `alert`
* **Default message**
```
{
"EVENT.ID": "{EVENT.ID}",
"TRIGGER.ID": "{TRIGGER.ID}",
"TRIGGER.VALUE": "{TRIGGER.VALUE}",
"TRIGGER.NAME": "{TRIGGER.NAME}",
"TRIGGER.DESCRIPTION": "{TRIGGER.DESCRIPTION}",
"TRIGGER.STATUS": "{TRIGGER.STATUS}",
"TRIGGER.SEVERITY": "{TRIGGER.SEVERITY}",
"TRIGGER.URL": "{TRIGGER.URL}",
"HOST.HOST": "{HOST.HOST}",
"HOST.IP": "{HOST.IP}"
}
```

#### Recovery operations
* **Default subject** `resolve`
* **Default message**
```
{
"EVENT.ID": "{EVENT.ID}"
}
```

#### Acknowledgment operations
* **Default subject** `ack`
* **Default message**
```
{
"EVENT.ID": "{EVENT.ID}"
}
```

1. Click the **Add** button to save the action
### Set up cron job
In the event that the events generated by Zabbix cannot be sent to ilert on the first attempt (e.g. due to a network problem), a cron job is set up. This cron job is executed every minute and sends all failed events to ilert.
1. Edit the crab file from the Zabbix user
```
> sudo crontab -u zabbix -e
```
1. Add the following entry
```
* * * * * /usr/lib/zabbix/alertscripts/ilert-zabbix.py -m send
```
Adjust the directory according to your `AlertScriptsPath` configuration in Zabbix.
1. The Zabbix integration is now set up!
## FAQ
**Are alerts automatically resolved in ilert?**
Yes, as soon as the status of an alert is OK in Zabbix, the associated alert is resolved in ilert.
**Can I link Zabbix to multiple alert sources in ilert?**
Yes, create several **ilert users** in Zabbix and store the corresponding **API key** in the user **Send To** field.
**What if my internet connection is lost? Are the events generated in Zabbix lost?**
No events are lost. The plugin saves the events locally in a temporary directory and tries to send them to ilert every minute. As soon as your connection is available again, buffered events are sent to ilert. We also recommend that you monitor your Internet connection with an external monitoring service. You can then send these alerts to ilert.
**The plugin does not work. How do I find the mistake?**
Please look first in the log file. The plugin uses the Unix / Linux system log for logging (eg under `/var/log/messages` or `/var/log/syslog` ). If you can not find the error, please contact our support at .
---
# Agent Instructions
This documentation is published with GitBook. GitBook is the documentation platform designed so that both humans and AI agents can read, navigate, and reason over technical content effectively. Learn more at gitbook.com.
## Querying This Documentation
If you need additional information that is not directly available in this page, you can query the documentation by asking a question.
Perform an HTTP GET request on the following URL with the `ask` and `goal` query parameters:
```
GET https://docs.ilert.com/integrations/inbound-integrations/zabbix/script.md?ask=&goal=
```
`ask` is the immediate question: it should be specific, self-contained, and written in natural language.
`goal` is what the user is ultimately trying to achieve, the reason they need the answer. Sharing it helps GitBook give you a better, more relevant answer. A goal is most helpful when it describes the outcome the user wants rather than restating the question. For example, with `ask=how do I create an API token`, a goal like `automate deployments from our CI pipeline` lets GitBook tailor the answer to that use case.
The response will contain a direct answer to the question and relevant excerpts and sources from the documentation.
Use this mechanism when the answer is not explicitly present in the current page, you need clarification or additional context, or you want to retrieve related documentation sections.